Best sonar settings for finding structure on Lake Nipissing
Navigating the vast and often subtle underwater topography of Lake Nipissing can be a real head-scratcher when you're trying to pinpoint those elusive fish-holding structures. It’s easy to feel like you’re just cruising over an endless flat bottom, missing all the sweet spots. This guide is here to untangle the complexities of your sonar unit, helping you dial in the best settings to reveal those hidden reefs, cunning weed lines, and subtle drop-offs that make all the difference on Lake Nipissing.
Understanding Sonar Basics for Structure Fishing
Before we dive into the nitty-gritty settings for Lake Nipissing, it’s crucial to understand what your sonar is actually doing. Think of your sonar unit as painting a picture of the underwater world using sound waves. Different types of sonar and different frequencies offer unique perspectives, much like having various paintbrushes for different details. Knowing how these tools work is the first step to becoming a structure-finding maestro.
The Role of Frequency and Cone Angle
Sonar units typically operate on various frequencies, and each has its strengths and weaknesses, especially when trying to find structure in a lake like Nipissing.
- Low Frequencies (e.g., 50 kHz or 83 kHz): These frequencies offer a wider cone angle and penetrate deeper into the water column. While they might not show the sharpest detail, they are excellent for broad coverage and for identifying overall changes in bottom contours over a large area. On Lake Nipissing, where you might be covering vast expanses of water, a lower frequency can help you spot large rock humps or general depth changes from a distance. However, in shallower areas, the wide cone can create a lot of 'noise' from surface clutter or reflections off the bottom, making it harder to discern fine details.
- High Frequencies (e.g., 200 kHz or 455/800 kHz for Down/Side Imaging): Higher frequencies provide a narrower cone angle and much greater detail. They're fantastic for differentiating between individual rocks, submerged timber, or even seeing fish tightly hugging the bottom. For picking apart specific features on a known reef or finding that exact weed edge on Lake Nipissing, higher frequencies are your best friend. The trade-off is less depth penetration and a smaller coverage area directly beneath your boat, but the clarity you gain for fine-tuning your approach to a piece of structure is invaluable.
Many modern fish finders offer dual or even triple frequency options, allowing you to switch between them or even view multiple frequencies simultaneously on a split screen. This flexibility is key on a diverse lake like Nipissing, where you might encounter shallow rocky areas, deep channels, and vast weed flats.
Differentiating Between 2D, DownScan, and SideScan
Modern sonar technology goes far beyond traditional 2D sonar. Most units today come equipped with DownScan Imaging (sometimes called DownVu or ClearVu) and SideScan Imaging (SideVu). Understanding what each mode shows you is paramount for effective structure finding.
- 2D Sonar (Traditional Sonar): This is your classic sonar view, displaying returns as arches for fish and lines for the bottom. It's excellent for identifying fish suspended in the water column and showing relative bottom hardness based on the thickness and intensity of the bottom return. On Lake Nipissing, you'll use this to mark schools of baitfish, individual walleye arches over a rocky flat, or to see how fish are relating to a particular depth contour. It's often the most reliable for seeing fish.
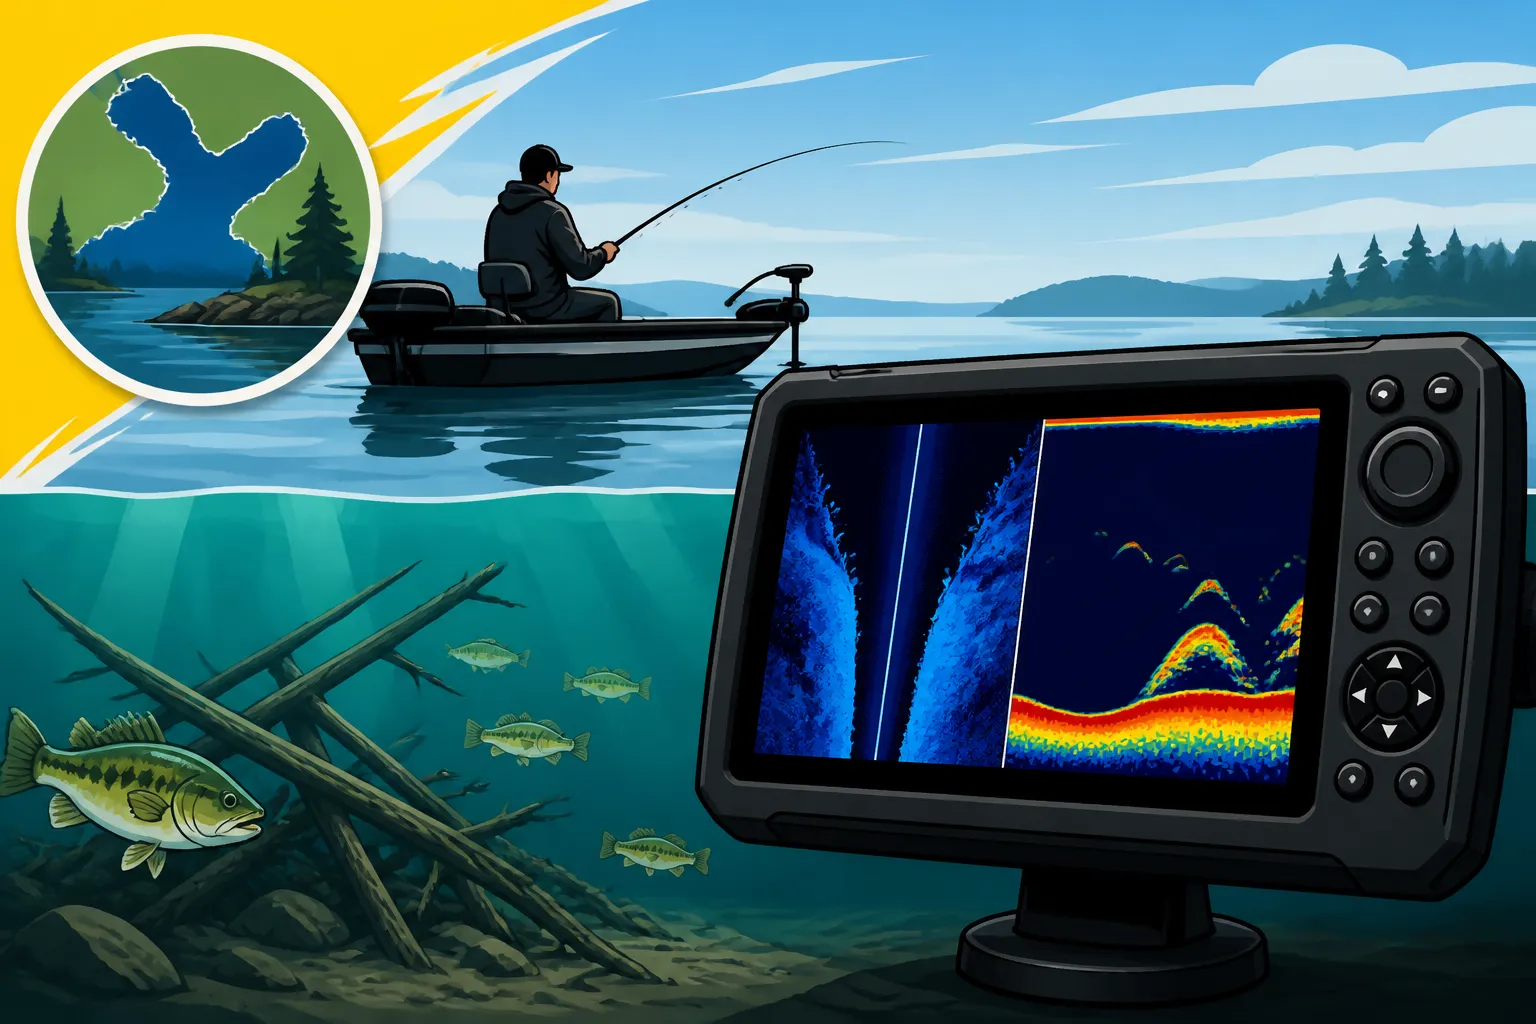
- DownScan Imaging: DownScan provides a photographic-like image directly beneath your boat, using high-frequency, narrow-beam sonar. This technology excels at showing the actual shape and detail of structure, such as submerged trees, rock piles, and even individual baitfish with incredible clarity. When you're directly over a subtle rock pile or a thick weed bed on Nipissing, DownScan will give you a much clearer picture of its composition than 2D sonar ever could, helping you discern whether it’s a sparse patch or a dense, fish-holding haven.
- SideScan Imaging: This is the game-changer for covering vast areas and finding structure that isn't directly beneath your boat. SideScan projects beams out to the sides, giving you a wide view of the bottom on both flanks of your vessel. On a large lake like Nipissing, where finding that needle in the haystack structure can be tough, SideScan allows you to scan hundreds of feet to either side, revealing hidden shoals, offshore humps, or distinct weed lines that you might have otherwise driven right past. It’s incredibly efficient for scouting new areas or locating productive fishing spots quickly. Many anglers rely heavily on SideScan when searching for the best fishing spots on Lake Nipissing because it dramatically expands their search capabilities.
Specific Settings for Lake Nipissing's Unique Challenges
Lake Nipissing presents a fascinating mix of fishing environments, from extensive shallow mud flats to scattered rock reefs and intricate weed beds. Dialing in your sonar settings to match these diverse conditions is key to success.
Optimizing for Shallow Water and Rock Reefs
Lake Nipissing is generally considered a shallower lake compared to some of Ontario's deeper glacial lakes, but it still has plenty of rocky structure, especially in areas like the South Bay or around the Manitou Islands. When fishing these areas, you're often looking for subtle changes in depth, rock size, and how fish are relating to them.
- Sensitivity: This is perhaps the most crucial setting. Too low, and you'll miss fish and subtle structure; too high, and your screen will be cluttered with noise. Start around 70-80% and adjust in 5% increments. In very shallow water (under 15 feet) over a rocky bottom, you might need to slightly reduce sensitivity to cut down on excessive bottom echoes and surface clutter. As you move into slightly deeper water, increase it to pick up fainter returns. The goal is a clear bottom line with distinct fish arches (on 2D) or detailed structure (on DownScan) without a blizzard of speckles.
- Range (Depth): Set your depth range just slightly deeper than the actual water depth. For instance, in 10 feet of water, set it to 15-20 feet. This puts the bottom line lower on your screen, allowing for better separation between the bottom and any fish holding tight to it. If your unit is set to auto-range, it might struggle to show fish close to the bottom effectively, especially over reefs.
- Scroll Speed: A faster scroll speed (often called chart speed) will stretch out the returns, making it easier to see individual fish arches or the nuances of a rock pile. A slower speed compresses the image, which can be useful when you're covering ground quickly and just want a general overview. For actively working over a known reef on Lake Nipissing, a faster scroll speed is usually preferred.
- Frequency Selection: When targeting rocky reefs and humps, use a higher frequency (200 kHz for 2D, 455 kHz or 800 kHz for DownScan/SideScan) to get the best detail. You want to see the texture of the rocks and distinguish between large boulders and smaller rubble. If you're searching for broader reef systems, a quick pass with a lower 2D frequency (e.g., 83 kHz) might help you locate the general area, then switch to high frequency and Down/SideScan to truly dissect it.
Dialing in for Weeds and Soft Bottoms
Lake Nipissing is also known for its extensive weed beds, which are prime habitat for northern pike, bass, and even walleye during certain times of the year. Finding the edges, pockets, and transitions within these weeds, or identifying fish over soft mud flats, requires different sonar considerations.
- Gain/Sensitivity for Weeds: When searching for fish in weeds, you often need to increase your sensitivity to see through the dense vegetation. However, too much gain will make the entire screen a green blob. It's a delicate balance. On 2D sonar, look for "breaks" in the solid green return of the weeds, which can indicate pockets where fish are hiding. DownScan will give you a much clearer picture of the weed structure itself, showing individual stalks and gaps.
- Frequency for Weeds: Higher frequencies (200 kHz and DownScan/SideScan) are essential for distinguishing different types of weeds and finding fish within them. They offer the resolution to pick out the distinct signatures of cabbage, coontail, or milfoil, and more importantly, the fish nestled amongst them. You'll definitely want to leverage your unit's capability to show detailed images of vegetation structure.
- Color Palette: Experiment with different color palettes on your sonar. Some palettes offer better contrast for discerning subtle changes in bottom hardness or for separating fish targets from dense weed growth. A palette that shows hard returns in bright, distinct colors and softer returns in more muted tones can be incredibly helpful on Lake Nipissing’s varied bottom.
- Soft Bottoms: When drifting over vast mud flats, which are common on Lake Nipissing, distinguishing between a featureless bottom and one with subtle hard spots or baitfish can be tricky. On 2D sonar, a soft bottom will typically show a thinner, less intense bottom return. A harder bottom (like clay or sand) will show a thicker, more intense line. Keep your sensitivity up and your scroll speed fairly fast to help reveal any subtle bottom transitions or small bait schools hugging the bottom in these areas.
Mitigating Interference and Noise
Sonar interference can be incredibly frustrating, turning your screen into an unreadable mess of random dots and lines. Lake Nipissing, with its numerous boats, varying electrical conditions, and sometimes turbulent waters, can certainly present these challenges.
- Surface Clutter: This is the noisy band at the top of your screen, caused by air bubbles and turbulence from your boat's prop. Most units have a "Surface Clutter" or "Noise Rejection" setting you can adjust. Increase it gradually until the clutter disappears, but don't overdo it, or you might start filtering out shallow-running fish.
- Noise Rejection/Interference Filter: These settings are designed to filter out electrical interference from your boat's engine, trolling motor, or other electronics. Experiment with "Low," "Medium," and "High" settings. If you're getting horizontal lines or random patterns, this is the first place to check. Sometimes, interference can also be caused by another boat's transducer frequency, especially in popular fishing areas.
- Transducer Placement: While not a setting you can change on the fly, proper transducer placement is critical. If your transducer is mounted incorrectly, it will always struggle to get a clean signal, no matter how much you tweak the settings. Ensure it's clear of obstructions, mounted deep enough, and not experiencing turbulence. A properly installed transducer will make all your settings adjustments far more effective.
Interpreting Sonar Returns: What to Look For
Having the right settings is only half the battle; the other half is understanding what your sonar unit is actually showing you. Learning to interpret those colors, lines, and blobs into a mental image of the underwater world takes practice, but it's incredibly rewarding.
Identifying Fish vs. Structure
This is the age-old question for every angler staring at a fish finder: "Is that a fish, or just part of the bottom?"
- Fish Arches (2D Sonar): On 2D sonar, fish typically appear as arches. A full, strong arch indicates a fish that passed through the entire sonar cone directly under your boat. Half-arches or partial lines usually mean the fish was on the edge of the cone or you passed over it quickly. The thickness and intensity of the arch can give clues about the size of the fish. Pay attention to arches that appear above the bottom line, or distinct from the main structure. Sometimes, a "blob" on the bottom could be a fish hugging the structure tightly. If you see multiple arches or a distinct school, that’s usually a strong indicator of actively feeding fish.
- Fish on DownScan/SideScan: On DownScan, fish appear as bright white or colored dots/streaks, often with a distinct "shadow" beneath them. They look more like actual fish shapes than arches. This clarity is fantastic for seeing how fish are orienting themselves to submerged trees or rock piles. SideScan, meanwhile, will show fish as white specks or "streaks" and sometimes even reveal their shadows, especially when they are suspended off the bottom. If you're scanning a large area of Lake Nipissing with SideScan and see several bright returns with clear shadows near a distinct piece of structure, you’ve likely found fish.
When in doubt, especially on 2D, look for separation. If the "fish" is directly on the bottom line with no space, it's probably part of the bottom. If there's a distinct gap, even a tiny one, it's much more likely to be a fish. Also, look for movement. If the "blob" stays in the same place despite your boat moving, it's structure. If it moves or disappears as you pass, it's a fish.
Reading Bottom Hardness and Composition
Knowing whether you're over hard rock, soft mud, or something in between can tell you a lot about what fish species to expect and how to approach them.
- 2D Sonar: On 2D sonar, a hard bottom (like rock, gravel, or packed clay) will typically produce a thicker, brighter, and often double bottom line. This is because the sound wave reflects strongly off the hard surface. A soft bottom (like mud or silt) will give a thinner, often fuzzier, and less intense single bottom line, as some of the sound energy is absorbed. On Lake Nipissing, learning to differentiate these patterns can help you quickly identify walleye-holding rock reefs versus less productive mud flats.
- DownScan/SideScan: While less direct than 2D for bottom hardness, DownScan and SideScan offer incredible visual detail for composition. You'll actually see the texture of the bottom. A rocky bottom will appear jagged and irregular, showing individual boulders and rubble. A sand flat will look smooth and even. A mud flat might appear soft and featureless. The clarity here is outstanding for seeing subtle transitions, like where a mud flat meets a harder sand or gravel ridge.
- Color Palettes for Bottom Composition: Again, experimenting with your unit's color palettes can make a big difference. Some palettes are designed to highlight differences in return intensity, which directly relates to bottom hardness. A red or yellow bottom line often indicates a very hard return, while blues or greens might suggest a softer bottom. Familiarize yourself with how your chosen palette represents these differences.
Advanced Tips and Troubleshooting
Even with the perfect settings, there are always little tricks and considerations that can elevate your sonar game on Lake Nipissing.
Using Waypoints and Mapping Features
Your sonar unit is more than just a picture of the bottom; it's a powerful navigation and memory tool. Don't just look at structure—mark it!
- Dropping Waypoints: The moment you see something interesting—a promising rock pile, a distinct weed edge, or a school of fish relating to structure—hit that waypoint button! This allows you to return to the exact spot later, saving you countless hours of searching. On Lake Nipissing, where finding that subtle productive spot can be like finding a needle in a haystack, precise waypoints are golden. Many anglers use waypoints not just for fish, but for navigation around hidden shoals, a crucial aspect of Ontario Boating Laws for Anglers.
- Overlaying Sonar with Maps: Most modern units allow you to overlay your sonar returns directly onto your GPS mapping. This is incredibly powerful. Imagine seeing a detailed contour map of Lake Nipissing, and simultaneously watching your DownScan reveal a submerged tree right on the edge of a contour line. This integration helps you understand the bigger picture and how structure relates to depth changes. Many anglers find detailed contour maps, often available through retailers like Amazon, invaluable for this purpose.
- Creating Custom Maps: Some advanced units and software allow you to create your own detailed contour maps by recording your sonar logs. This is a fantastic way to uncover previously uncharted humps, reefs, and drop-offs on Lake Nipissing, giving you a distinct advantage.
Software Updates and Transducer Placement
These might seem minor, but they can significantly impact your sonar's performance.
- Keep Your Software Updated: Just like your phone, your sonar unit's operating software gets updates. These updates often include performance enhancements, bug fixes, and sometimes even new features. Regularly check your manufacturer's website (Humminbird, Lowrance, Garmin, etc.) for the latest software versions and follow their instructions for updating. It's a simple step that can yield noticeable improvements.
- Check Transducer Placement: If you're consistently getting poor returns despite tweaking settings, re-examine your transducer. Is it clean? Is it mounted correctly, free from turbulence? Is it level? Even a slight angle can distort your SideScan image. Issues with transducer mounting or cleanliness are often the root cause of persistent sonar problems. For kayak anglers, ensuring proper transducer mounting for your specific vessel is a key consideration, especially if you're exploring Best Kayak for Lake Erie.
Complementary Tools for Structure Fishing
Sonar is just one piece of the puzzle. Other tools can significantly enhance your ability to find and fish structure effectively on Lake Nipissing.
- GPS and Mapping: As mentioned, a good GPS unit with detailed maps (Navionics, LakeMaster, C-MAP) is indispensable. It allows you to navigate safely, understand depth contours, and mark spots precisely. Combining this with your sonar's real-time data creates a powerful scouting system. If you're looking for more general information on navigation, our guide on the Ontario Fish ON-Line Interactive Zone Map, Explained can be a great resource.
- Polarized Sunglasses: Seriously, don't underestimate the power of polarized sunglasses. On calm, sunny days, they cut glare and allow you to literally see into the water, spotting shallow rock piles, weed edges, or even cruising fish that your sonar might not pick up instantly, especially in very shallow Nipissing waters. You can find a wide range of quality polarized sunglasses on Amazon that will make a difference.
- Water Temperature Gauge: Fish are highly sensitive to water temperature. Knowing the temperature at various depths can help you predict where different species might be holding on structure. Many sonar units have integrated temperature sensors, but a separate handheld gauge can offer precise readings.
- Good Old Fashioned Observation: Don't forget to look around! Bird activity, baitfish skipping on the surface, or even other anglers fishing a certain type of area can give you clues about productive structure. Combine what your electronics tell you with what your eyes see, and you'll be well on your way to mastering structure fishing on Lake Nipissing. When chasing species like walleye, understanding their habits in relation to the structure is crucial; explore our How to Catch Walleye in Ontario guide for more specific techniques.
When you're out on the water, the process is always an ongoing adjustment. Start with these baseline settings and then fine-tune based on what you're seeing and the specific conditions you're encountering. Every day on Lake Nipissing is a new adventure, and your sonar is your window into its underwater secrets. For more general insights into the lake, check out our comprehensive Lake Nipissing Fishing Guide, and if walleye is your target, you'll love our Best Walleye Lakes in Ontario content. We even have a detailed piece on Walleye Spawning Season in Ontario to help you understand their patterns.
| Sonar Type / Frequency | Best Use for Lake Nipissing Structure | Key Settings to Adjust | What to Look For |
|---|---|---|---|
| 2D Sonar (High) | Detailed fish arches, bottom hardness, structure contours in various depths. Good for marking individual fish. | Sensitivity (70-90%), Depth Range (manual slightly deeper than actual), Scroll Speed (fast) | Thick, bright bottom line for hard structure; thinner for soft. Distinct arches for fish. |
| 2D Sonar (Low) | Broad coverage for scouting large areas, deeper water penetration. General contour mapping. | Sensitivity (60-80%), Depth Range (auto usually fine), Scroll Speed (medium) | Overall changes in depth, large humps, schools of baitfish in open water. |
| DownScan Imaging | Photographic detail of structure directly beneath the boat (e.g., submerged trees, rock piles, weed definition). | Contrast/Sensitivity (adjust for clearest image), Color Palette (experiment for detail) | Realistic shapes of structure, fish as bright dots with shadows, clear weed composition. |
| SideScan Imaging | Wide area scouting for hidden reefs, weed lines, offshore humps, drop-offs away from the boat. | Range (50-100ft per side), Contrast/Sensitivity (optimize for detail and range), Scroll Speed (slow to medium) | Structure appearing as light or dark areas with distinct shadows, fish appearing as bright specks/streaks. |
Disclaimer
This article is for general informational purposes only and does not constitute professional advice. Laws, prices and regulations vary by location and change over time. Consult a qualified professional for guidance on your specific situation.