Best Dry Bag for Kayak Fishing
There's nothing quite like the freedom of gliding across an Ontario lake or river in your kayak, paddle dipping rhythmically, on the hunt for that perfect catch. But as any seasoned kayak angler knows, that serene experience can quickly turn stressful when water, whether from a rogue wave, unexpected rain, or even an accidental capsize, threatens your essential gear. Losing your phone, soaking your extra layers, or having your lunch turn into mush is a frustrating reality many face. This comprehensive guide is here to help you navigate the world of dry bags, ensuring your valuables and necessities stay safe and dry on every single kayak fishing adventure.
Why a Dry Bag is Essential for Kayak Fishing
When you're out on the water, especially in a smaller craft like a fishing kayak, you're inherently exposed to the elements. Unlike a large powerboat with ample covered storage, a kayak offers minimal protection. This vulnerability makes a reliable dry bag not just a convenience, but a fundamental piece of safety and practical gear. Think of it as your portable, watertight safe for everything you can't afford to get wet.
Protecting Electronics and Valuables
Picture this: you're out on Lake Erie, the walleye are biting, and you've just landed a beauty. You reach for your phone to snap a photo, and a sudden chop from a passing boat sends spray directly over your deck. Or worse, you're navigating a tricky section of the French River, your kayak clips a submerged log, and suddenly you're in the drink. Without a dry bag, your expensive smartphone, your car keys, your wallet, and even your Printing or Carrying a Digital Fishing License in Ontario are all instantly at risk. Water damage to electronics is often irreparable and incredibly costly. Keys can rust or seize, and a soaked wallet can ruin important documents and cash. A good dry bag acts as an impenetrable shield against these common, but often devastating, scenarios. It provides peace of mind, allowing you to focus on the fishing, not worrying about your gear.
Keeping Essentials Dry and Accessible
Beyond the big-ticket items, there are countless small essentials that make your day on the water comfortable and safe. An extra pair of socks or a dry fleece for when the temperature drops, a first-aid kit for minor scrapes, a map of the local Kawartha Lakes Fishing Guide if your GPS fails, or even just your lunch and snacks. Imagine shivering through the rest of your trip because your backup jacket got soaked, or having to cut your day short because a simple cut couldn't be properly addressed. Wet food is unappetizing at best, and a soggy sandwich isn't going to fuel your next cast. A dry bag ensures these items remain exactly as you packed them – dry, clean, and ready for use. It enhances your comfort, extends your time on the water, and contributes significantly to your overall well-being during your fishing excursion.
Preparing for Ontario's Unpredictable Weather
Ontario's weather can be notoriously fickle. You might start your day under brilliant sunshine, only for dark clouds to roll in within an hour, bringing a sudden downpour or strong winds that whip up whitecaps. Whether you're targeting smallmouth bass on Georgian Bay or exploring quiet brook trout streams in Algonquin Park, you need to be prepared for anything. Even a light mist throughout the day can penetrate gear left exposed, leading to dampness that can be chilling in cooler temperatures. A properly sealed dry bag ensures that whether it's pouring rain, heavy spray, or an accidental dip in the lake, your critical items remain bone dry. It's an indispensable tool for adapting to changing conditions, keeping you comfortable and your gear safe, no matter what Mother Nature throws your way.
Key Features to Look For in a Kayak Fishing Dry Bag
Choosing the right dry bag isn't just about grabbing the first one you see. There are specific features that distinguish a truly reliable and functional dry bag for kayak fishing. Understanding these elements will help you select a bag that stands up to the rigours of the environment and keeps your gear protected for years to come.
Material and Durability
The material a dry bag is made from is paramount to its effectiveness and lifespan. The two most common materials are PVC (polyvinyl chloride) and TPU (thermoplastic polyurethane). PVC bags are generally more affordable, very durable, and highly resistant to punctures and abrasion. They're often a great choice for general kayak fishing use. However, some anglers prefer TPU, which is a more environmentally friendly material, often lighter, more flexible in cold weather, and can be more resistant to UV degradation over time. The thickness of the material, often measured in denier, also plays a role – a higher denier means a thicker, more robust material. For example, a 500D PVC bag will be quite durable, suitable for many Ontario fishing trips.
Equally important is the construction of the seams. Look for bags with welded seams rather than stitched and taped seams. Welded seams create a much stronger, fully waterproof bond between the fabric panels, making them significantly more resistant to leaks, especially under pressure or prolonged exposure to water. Stitched seams, even if taped, can eventually fail, allowing water to seep through tiny needle holes. If you're frequently dragging your kayak over rocky shorelines or dealing with abrasive conditions on rivers like the Ottawa, investing in a bag with robust material and welded seams will pay off by preventing wear and tear and ultimately protecting your precious cargo.
Closure System
The closure system is the second critical component in determining a dry bag's waterproof capabilities. The two primary types you'll encounter are roll-top closures and zippered closures.
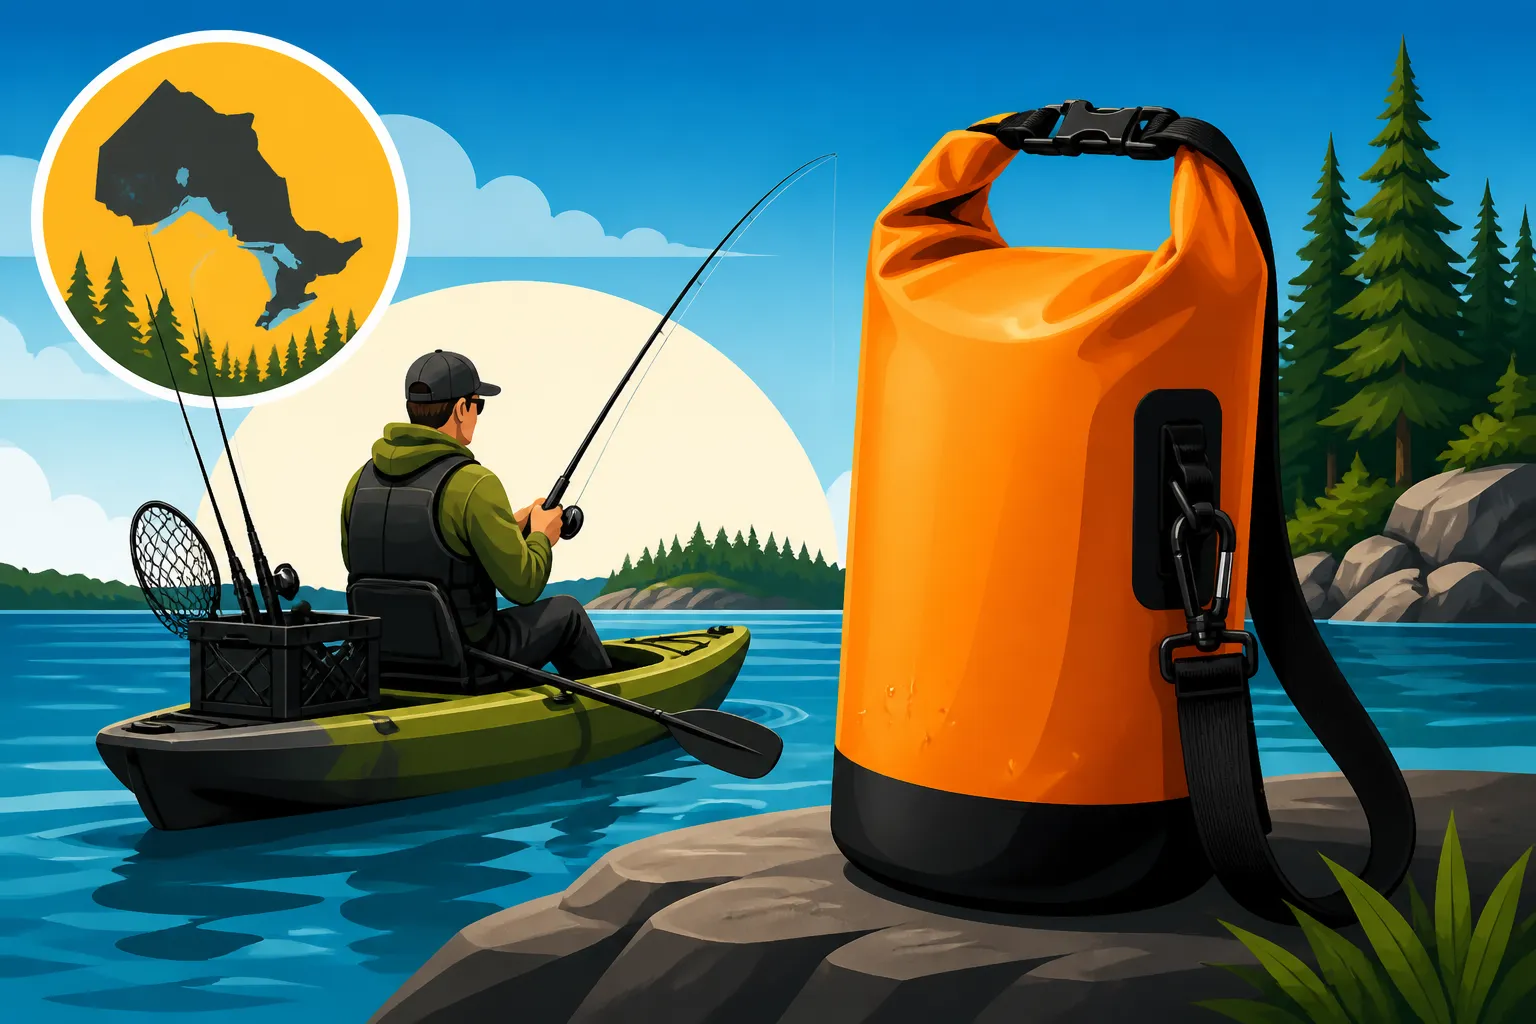
Roll-top dry bags are by far the most common and generally considered the most reliable for preventing water ingress. This system involves rolling the top edge of the bag down a minimum of three to four times, then securing the rolled section with buckles that clip together, often creating a handle. When properly executed, this creates an incredibly watertight seal, trapping air inside and making the bag buoyant. They are simple, effective, and less prone to mechanical failure than zippers. This is why you'll see a vast selection of roll-top dry bags at places like Bass Pro Shops.
Zippered dry bags, on the other hand, typically feature heavy-duty, submersible zippers, often referred to as TIZIP or similar brands. These zippers are designed to be completely waterproof when closed. The main advantage of zippered bags is quick and easy access to your gear without having to unroll and reroll the top. However, these zippers can be stiff, require more maintenance (like regular lubrication), and are often found on more expensive, specialized bags. They can also be a point of failure if not meticulously cared for or if debris gets caught in the teeth. For most kayak anglers, especially those on a budget, a good quality roll-top dry bag offers the best balance of reliability, ease of use, and cost.
Attachment Points and Carry Options
Once your gear is safely inside your dry bag, you need a way to secure the bag itself to your kayak and carry it when you're off the water. This is where attachment points and carry options come into play. Look for D-rings or other strong loops strategically placed on the bag. These allow you to use bungee cords, carabiners, or straps to secure the dry bag to your kayak's deck, tankwell, or inside a hatch. This is crucial to prevent the bag from floating away if you capsize or shifting around uncomfortably while paddling.
Many dry bags also feature grab handles for easy lifting and carrying short distances. For those who frequently portage their kayaks or walk longer distances from their vehicle to the launch, a dry bag with shoulder straps or even backpack-style straps can be a game-changer. These straps should be adjustable and comfortable, especially if you're carrying a heavy load of gear. Some larger dry bags even come with a padded back panel for increased comfort during longer treks. Consider how you'll be transporting your gear both on and off the water when evaluating these features. A well-designed dry bag, like many options available on Amazon, will offer multiple ways to attach, carry, and integrate seamlessly with your Best Kayak for River Fishing in Ontario.
Different Types of Dry Bags for Kayak Anglers
The world of dry bags is more diverse than you might initially think, with various designs tailored to different needs and activities. For kayak anglers, understanding these types can help you choose the perfect storage solution for your specific gear and fishing style.
Traditional Roll-Top Dry Bags
These are the quintessential dry bags, the workhorses of the paddling world, and likely what comes to mind when you hear "dry bag." They are characterized by their simple, yet highly effective, roll-top closure system and typically a cylindrical or somewhat oval shape. Their primary appeal lies in their versatility, availability in a vast range of sizes (from tiny 2-liter bags for essentials like keys and wallets to massive 50-liter or larger bags for camping gear), and their relative affordability.
Traditional roll-top dry bags are excellent for general gear storage: extra clothing, towels, camp kitchen items for overnight trips, or bulkier items that need to stay absolutely dry. Many feature a single large compartment, making them easy to pack and unpack, though organization sometimes requires using smaller stuff sacks or pouches inside. They are typically made from durable PVC or TPU and often come with D-rings for attachment. If you're looking for a reliable, no-frills option that gets the job done without breaking the bank, a traditional roll-top dry bag is an outstanding choice. You'll find these aplenty in various colours and sizes at outdoor retailers like Bass Pro Shops, making it easy to grab one that suits your capacity needs, whether it's for a quick morning fish on Lake Scugog or a full day's adventure on the Madawaska River.
Dry Backpacks
For kayak anglers who spend a good portion of their time off the water, hiking to remote launch points, portaging around rapids, or simply need a more comfortable way to transport their gear, a dry backpack is an invaluable solution. These bags combine the waterproof integrity of a dry bag with the ergonomic design of a traditional backpack.
Dry backpacks typically feature padded shoulder straps, often a sternum strap, and sometimes a hip belt for distributing weight effectively. This makes carrying heavy loads over uneven terrain much more comfortable than with a simple dry bag. While the main compartment is waterproof (usually with a roll-top closure), many dry backpacks also incorporate external, non-waterproof pockets or mesh sleeves for quick access to items that don't need to be protected from water, like water bottles, fishing pliers, or quick-grab snacks. Some even have attachment points or bungee systems on the exterior for securing rods or extra jackets. They are perfect for those multi-day canoe and kayak fishing trips in Northern Ontario or accessing secluded spots that require a bit of a hike. The comfort of a dry backpack, even for just carrying your gear from the car to the water's edge, can make a significant difference to your pre-fishing experience.
Specialty Dry Bags and Cases
Beyond the general-purpose dry bags, there's a world of specialized options designed to meet very specific needs of kayak anglers.
Deck bags are specifically designed to fit securely on the deck of your kayak, often in front of or behind the cockpit. They usually feature multiple attachment points and sometimes have a rigid shape or internal frame to maintain their form. Many deck bags offer a combination of waterproof storage (often a roll-top compartment) and accessible non-waterproof pockets or bungee cords on the exterior for items you need to grab quickly, like sunscreen, fishing tools, or a small tackle tray. These are fantastic for keeping frequently used items close at hand without compromising the watertight integrity of your critical gear.
Dry tubes are long, narrow dry bags, often favored by river paddlers for fitting into tight spaces or for protecting elongated items like maps rolled in a protective sleeve or a compact fishing net. They're excellent for smaller, hard-to-access hatches.
For the ultimate protection of highly sensitive electronics or fragile items, hard cases (like those made by brands such as Pelican or similar heavy-duty manufacturers) are the way to go. These are not technically "bags" but often serve the same purpose. They are rigid, crush-proof, dust-proof, and fully submersible, featuring O-ring seals and robust latches. While heavier and less flexible than dry bags, they offer unparalleled protection for cameras, drones, or sophisticated fish finders. They might not fit everywhere in a kayak, but for crucial, expensive items, they provide an unmatched level of security. Choosing the right specialty bag depends on what kind of gear you're looking to protect and how you plan to store it in your Best Kayaks for Ontario Fishing.
| Dry Bag Type | Primary Use Case | Pros | Cons |
|---|---|---|---|
| Traditional Roll-Top | General gear, clothing, food, electronics | Versatile, wide range of sizes, cost-effective, very reliable | Can be bulky, less comfortable to carry long distances |
| Dry Backpack | Gear transport to launch, portaging, overnight trips | Comfortable to carry, often has external non-waterproof pockets | Can be heavier, may take up more space when empty |
| Deck Bag | Quick-access items on kayak deck | Designed for kayak fit, easy access to frequently used items | Limited capacity, may not be fully submersible if not a pure dry bag |
| Hard Case | Fragile electronics, cameras, sensitive equipment | Ultimate protection (crush-proof, dust-proof, fully submersible) | Heavy, rigid, expensive, limited to specific shapes and sizes |
Sizing Your Dry Bag: What to Consider
One of the most common dilemmas when buying a dry bag is figuring out the right size. Too small, and you'll be leaving essential items vulnerable. Too large, and it becomes unwieldy, takes up valuable space, and can affect your kayak's stability. Finding that sweet spot is key to a comfortable and efficient fishing trip.
Assessing Your Gear Needs
Before you even look at liters, take inventory of what you absolutely need to keep dry. Start with the non-negotiables: your phone, car keys, wallet, fishing license, and any medications. Then, consider comfort and emergency items: an extra layer of clothing (fleece, rain jacket), a small first-aid kit, a headlamp if you might be out late, and perhaps a small towel. If you bring a DSLR camera, a pair of binoculars, or a portable battery pack, those definitely need a dry home. Don't forget food and drinks for your trip – while a water bottle can handle a splash, your sandwiches and snacks probably can't.
Think about the length of your trip as well. A quick two-hour outing on a local pond near Kingston might only require a small 5-10 liter bag for essentials. However, a full-day adventure targeting muskellunge on Lake St. Clair or an overnight camping trip means you'll need significantly more capacity for extra clothing, sleeping gear, and more substantial food provisions. Making a physical pile of everything you intend to pack can give you a surprisingly accurate visual of the volume you'll need.
Matching Size to Kayak Storage
Your kayak itself will dictate some of your dry bag sizing choices. Different kayaks offer different storage options. Sit-on-top kayaks often have large open tankwells with bungee cords, which can accommodate bigger, bulkier dry bags or dry backpacks. Many also feature sealed hatches, but the openings can be surprisingly small, meaning a long, slender dry tube might fit better than a wide, traditional dry bag. Sit-inside kayaks usually have internal storage compartments or bulkheads that are accessed via smaller hatches. These spaces are often more constrained.
Consider the layout of your specific kayak. Do you want your dry bag accessible while paddling, or can it be stowed away? A smaller bag for immediate essentials might sit on your lap or be clipped to the deck, while a larger bag with spare clothes might go in a stern hatch. Measuring the dimensions of your kayak's hatches or available deck space will give you a concrete idea of the maximum size bag you can realistically use. For instance, if your hatch opening is 10 inches wide, a dry bag with a 12-inch diameter simply won't fit, no matter how many liters it is. Planning how your dry bag integrates with your Best Kayak for Lake Erie is just as important as the bag's capacity.
The "Less is More" Principle
While it might be tempting to bring every conceivable item "just in case," adopting a "less is more" mindset can greatly enhance your kayak fishing experience. Over-packing leads to several problems:
- Reduced Space: A bulky dry bag takes up precious real estate in your kayak, potentially hindering your ability to cast, paddle, or move freely.
- Increased Weight: More gear means more weight, which can affect your kayak's trim, stability, and paddling efficiency, especially if you're battling currents on a river.
- Accessibility Issues: A gigantic dry bag crammed with everything might make it harder to find that one item you need quickly, turning a simple grab into a frustrating rummage.
- Stability Risk: An improperly stowed, oversized dry bag can shift during maneuvers, potentially leading to instability, especially in choppy water.
Instead, prioritize multi-purpose items and truly essential gear. For example, your rain jacket can double as an extra windbreaker. A compact first-aid kit is better than a giant one. If you're going for a day trip, focus on what you'll realistically need for those hours on the water. For longer trips, consider what you must have and what can be left behind or safely stored elsewhere. A few strategically packed smaller dry bags might be more efficient than one enormous, unwieldy one. Keeping your setup streamlined makes for a more enjoyable and safer time on the water, allowing you to maximize your focus on finding the best fishing spots in Ontario.
How to Properly Pack and Seal Your Dry Bag
Even the most robust dry bag is only as effective as the person packing and sealing it. A simple mistake can render its waterproof capabilities useless, putting your gear at risk. Taking a few extra moments to pack and seal correctly can save you a lot of headache and heartache later on.
Packing Strategically
Packing a dry bag isn't just about tossing everything in. Strategic packing ensures your gear is organized, weight is distributed evenly, and frequently accessed items are easy to retrieve. Start by thinking about what you might need first. Items like a snack, sunscreen, or a small tackle box should be placed closer to the top. Items you won't need until the end of the day or in an emergency, like a spare change of clothes or a first-aid kit, can go at the bottom.
Consider using smaller, lightweight dry sacks or Ziploc bags inside your main dry bag for extra organization and an additional layer of protection for super sensitive items like your phone or car keys. This "bag-in-a-bag" approach is particularly useful if your main dry bag gets a minor puncture – your most critical items still have a chance of staying dry. Distribute weight evenly within the bag, especially if it's a larger one, to maintain balance in your kayak. Avoid creating sharp points with rigid items that could potentially compromise the bag's integrity. For instance, if you're bringing a small fishing multi-tool, wrap it in a towel or position it away from the bag's edges. This thoughtful approach to packing ensures efficiency and maximizes protection.
The Roll-Top Sealing Method
The roll-top closure system is incredibly effective, but it requires correct execution to guarantee watertightness. Here’s a step-by-step guide to properly sealing your roll-top dry bag:
- Remove Excess Air: Before rolling, gently press down on the bag to expel as much air as possible. While some air provides buoyancy, too much can make the bag bulky and difficult to seal tightly, and it can also create pressure points that might strain the seams.
- Align the Top Edges: Bring the two opposite stiffened edges of the bag's opening together. Ensure they are perfectly aligned and free of any wrinkles or debris. This initial alignment is crucial for forming a tight seal.
- Perform the First Roll: Fold the aligned edges down once, creating a tight crease.
- Continue Rolling: Continue to roll the top down tightly, typically a minimum of three full rolls (and often four or five for maximum security, especially if the bag is not entirely full). Each roll should be snug and even. The material is designed to press against itself, forming a barrier.
- Secure the Buckles: Once you've completed your rolls, bring the male and female buckles together and snap them shut securely. This locks the rolled section in place and creates a handle or attachment point.
Always double-check your seal before heading out, especially if you're embarking on a longer trip or expecting rough water. A properly sealed dry bag will feel taut and buoyant. If it feels soft or easily compresses, you likely haven't rolled it enough or the seal isn't tight.
Securing Your Dry Bag in the Kayak
Once your dry bag is perfectly packed and sealed, the final critical step is securing it within your kayak. An unsecured dry bag, even if waterproof, can become a nuisance or even a hazard. If you capsize, it could float away, leaving you scrambling to retrieve it in potentially dangerous conditions.
Most dry bags come equipped with D-rings, loops, or grab handles that are specifically designed for securing. Use bungee cords, carabiners, or even small lengths of rope to tie your dry bag to existing attachment points on your kayak, such as deck lines, other D-rings on the kayak itself, or within the bungee rigging in your tankwell. If you have a larger bag in an open storage area, consider using two attachment points to prevent it from shifting side-to-side.
For smaller, lighter dry bags holding essentials like your phone, you might attach them to a Best Dry Box for Phone and Keys on the Water and then secure that to your PFD or a spot directly in front of you. When stowing bags inside hatches, ensure they fit snugly and won't rattle around or block access to other areas. If a bag is too loose, it can shift your kayak's centre of gravity, which might be particularly noticeable if you're paddling an Inflatable Kayak for River Fishing. The goal is to keep the bag firmly in place, whether you're paddling hard, encountering waves, or performing a quick re-entry after a swim. A well-secured dry bag means one less thing to worry about, letting you enjoy your time on the water, focused on the fishing.
Maintaining Your Dry Bag for Longevity
A good dry bag is an investment in protecting your gear. Like any piece of outdoor equipment, proper care and maintenance will significantly extend its lifespan and ensure it performs optimally on every fishing trip. Neglecting your dry bag can lead to mildew, material degradation, and ultimately, leaks.
Cleaning and Drying
After each use, especially if your dry bag has been exposed to saltwater, mud, fish guts, or sugary drinks, it's crucial to clean it thoroughly.
- Rinse: Empty the bag and rinse both the inside and outside with fresh, cool water. You can use a mild soap or a specialized gear cleaner if there's stubborn dirt or smell. Avoid harsh detergents or bleach, as these can degrade the material and compromise the waterproof coating.
- Scrub Gently: Use a soft cloth or sponge to gently scrub any dirty areas. Pay particular attention to the closure system, buckles, and any seams, ensuring no sand or debris is lodged in these critical areas.
- Rinse Again: Make sure all soap residue is completely rinsed off.
- Dry Thoroughly: This is perhaps the most critical step. Hang the dry bag upside down, with the top open, in a well-ventilated area away from direct sunlight. Allow it to air dry completely, both inside and out. Mold and mildew can quickly form in damp conditions, which not only smells terrible but can also damage the material and compromise the bag's waterproof properties. Ensure it's bone dry before storing.
Inspecting for Damage and Repairs
Regularly inspect your dry bag for any signs of wear and tear. A small tear or a weakened seam can be easily overlooked but can lead to a catastrophic failure on the water.
- Check the Fabric: Look for any abrasions, punctures, or thinning spots in the main body of the bag. Pay close attention to corners and edges, which are often subjected to more friction.
- Examine Seams: Run your fingers along all welded or taped seams. Look for any lifting, fraying, or separation.
- Inspect the Closure System: Check the roll-top stiffener for cracks or damage. For zippered dry bags, inspect the teeth and slider for any issues, and ensure they operate smoothly. Also, check all buckles and straps for cracks or signs of weakening.
Most minor punctures and small tears in PVC or TPU dry bags can be easily repaired with a patch kit, often available from the same retailers that sell dry bags, like Bass Pro Shops or even online at Amazon. These kits usually come with adhesive patches and can be a lifesaver, allowing you to quickly mend a small hole and extend the life of your bag. Don't wait until a leak occurs to perform these checks; proactive inspection can prevent costly damage to your gear.
Proper Storage
How you store your dry bag when it's not in use is just as important as how you clean it. Improper storage can lead to premature material breakdown and unpleasant odors.
- Fully Dry: As mentioned, ensure the bag is absolutely, completely dry before storing it. Any residual moisture is an invitation for mold and mildew.
- Unrolled or Loosely Folded: Do not store a roll-top dry bag with the top tightly rolled or buckled shut. This can put undue stress on the material and seams, leading to permanent creases or cracking over time. Instead, store it unrolled, with the top open, to allow for air circulation. If space is limited, fold it loosely rather than tightly creasing it.
- Cool, Dark Place: Store your dry bag in a cool, dry place away from direct sunlight and extreme temperatures. UV radiation can cause PVC and TPU materials to break down and become brittle over time, reducing their flexibility and waterproof capabilities. A basement storage room or a gear closet is ideal.
By following these maintenance tips, your dry bag will remain a reliable, waterproof companion for countless Kayak Fishing Techniques for Ontario Lakes and beyond, protecting your gear and your peace of mind for many seasons to come.
Disclaimer
This article is for general informational purposes only and does not constitute professional advice. Laws, prices and regulations vary by location and change over time. Consult a qualified professional for guidance on your specific situation.