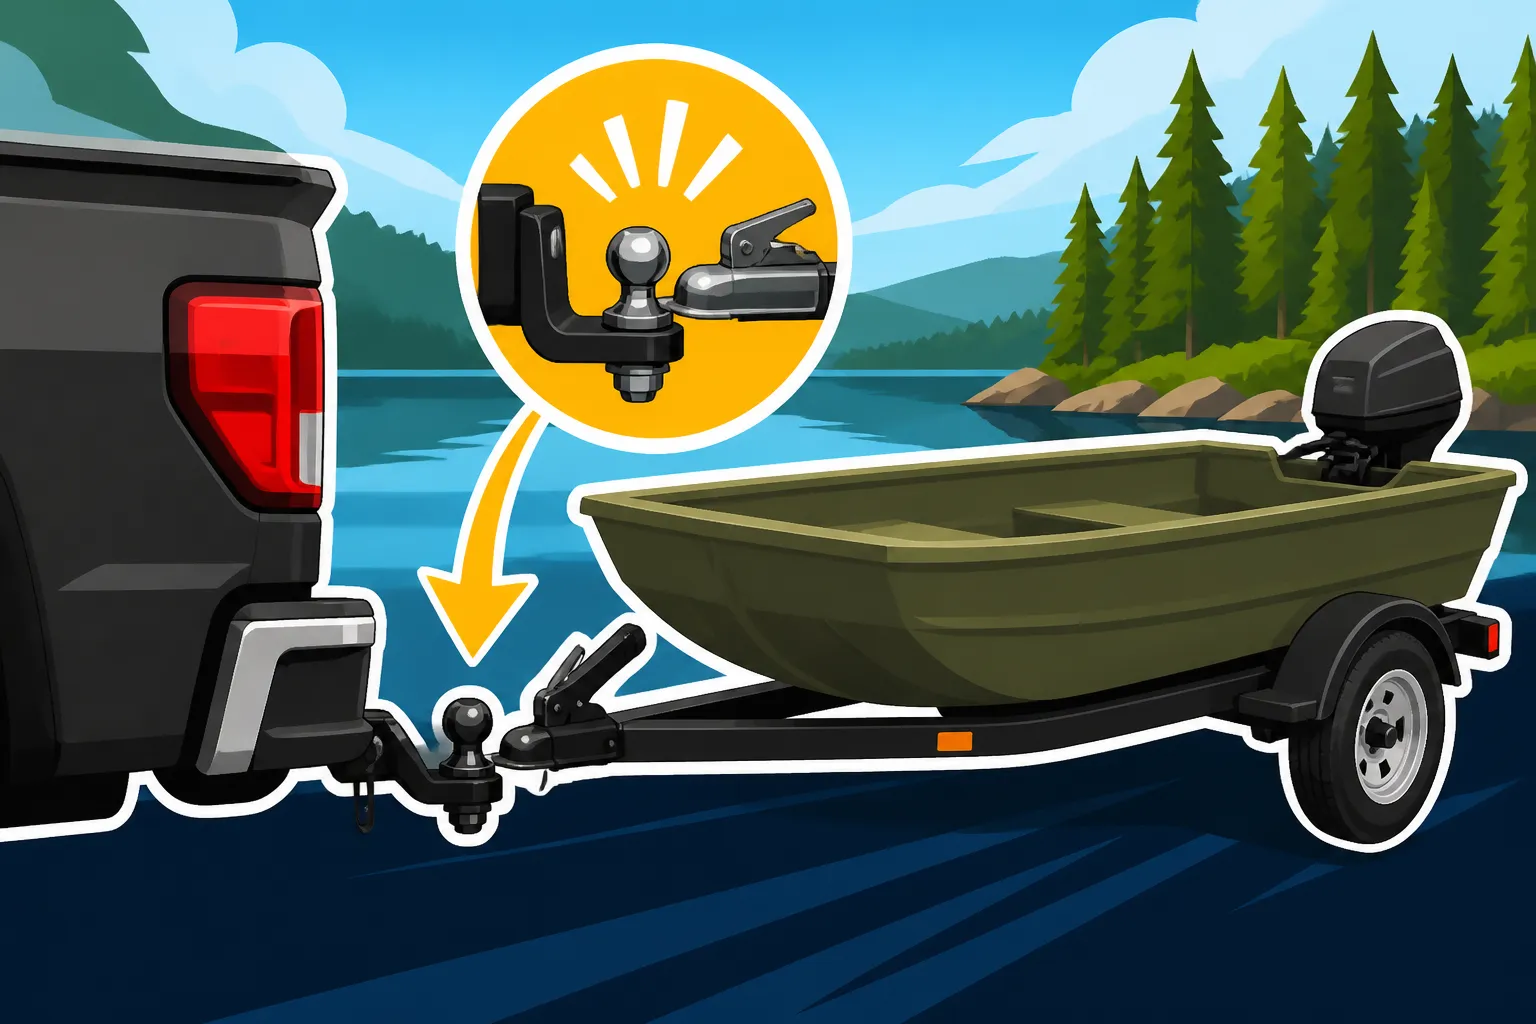
Best trailer hitch setup for a small jon boat
Setting up your boat trailer for the first time, or even getting a new vehicle and having to figure out the right hitch configuration for your small jon boat, can feel like a daunting task. It’s not just about connecting a few pieces; it’s about ensuring your precious fishing rig gets to the water safely and legally, especially on Ontario's diverse roads. This comprehensive guide will walk you through everything you need to know to choose, install, and maintain the best trailer hitch setup for your small jon boat, making sure you’re ready for your next adventure on the water.
Understanding the Basics: What Your Jon Boat Trailer Needs
Before you even think about buying components, it’s crucial to understand the foundational elements of a trailer hitch setup. This isn't just about towing; it's about connecting your vehicle securely to your jon boat trailer so that it becomes a single, manageable unit on the road. Getting this right is paramount for your safety and the safety of everyone else on the road.
The Hitch Receiver: Classifications and Capacity
The hitch receiver is the robust, square-shaped tube that attaches directly to the frame of your towing vehicle. This isn't a one-size-fits-all component; receivers are categorized into classes based on their maximum towing capacity and the size of their opening. For a small jon boat, which tends to be relatively light, you'll likely be looking at a Class I or Class II receiver.
A Class I receiver typically has a 1-1/4 inch square opening and can handle gross trailer weights up to around 2,000 pounds. This is often more than sufficient for many aluminum jon boats, especially those under 14 feet with a small outboard and minimal gear. A Class II receiver also usually features a 1-1/4 inch opening but boasts a higher capacity, often up to 3,500 pounds. This extra buffer is great if you have a slightly larger jon boat, heavier gear, or if you anticipate upgrading to a bigger small boat down the line. It’s always smart to have a little more capacity than you think you need, but don't overdo it to the point of unnecessary expense or a receiver that's too heavy for your vehicle's frame. You'll often find these at automotive supply stores or online retailers like Amazon, offering different brands to fit various vehicle makes and models.
The Ball Mount: Drop, Rise, and Length Considerations
Once you have your hitch receiver, the next piece of the puzzle is the ball mount, also known as a drawbar or hitch bar. This component slides into the receiver and provides the platform for your hitch ball. The critical factor here for jon boat trailers, and any trailer really, is achieving a level towing position. If your trailer is tilted too far up or down, it can affect braking, tire wear, and stability, especially on highways or during quick maneuvers.
Ball mounts come in various designs, featuring either a "drop" (to lower the hitch ball) or a "rise" (to raise it) to accommodate different vehicle and trailer heights. To determine what you need, measure the height from the ground to the top of your receiver opening, and then measure the height from the ground to the top of your trailer coupler when the trailer is level. The difference between these two measurements will tell you if you need a drop or a rise, and by how much. For example, if your receiver is 18 inches off the ground and your level trailer coupler is 15 inches, you'll need a ball mount with a 3-inch drop. The length of the ball mount is also a consideration; it needs to extend far enough to clear your vehicle's bumper, but not so far that it creates excessive leverage or reduces ground clearance. Many anglers find adjustable ball mounts useful if they tow different trailers or switch vehicles, offering flexibility without buying multiple fixed mounts.
The Hitch Ball: Size and Material Matters
The hitch ball is the direct connection point between your ball mount and the trailer's coupler. They typically come in a few standard sizes, with 1-7/8 inch, 2 inch, and 2-5/16 inch being the most common. For small jon boat trailers, you’ll almost certainly be using either a 1-7/8 inch or a 2-inch ball. It’s absolutely essential that the size of your hitch ball precisely matches the size of your trailer's coupler. A mismatch, even by a small fraction, can lead to the trailer disconnecting during transit, which is an incredibly dangerous situation nobody wants to experience.
You'll usually find the required ball size stamped on the trailer coupler itself. If not, a quick measurement of the coupler's opening with a caliper or even a tape measure can confirm it. Hitch balls are generally made of steel, often chrome-plated for corrosion resistance, but you can also find stainless steel options for maximum durability, especially in environments where they are exposed to water frequently. When choosing, ensure it has a weight rating equal to or greater than your trailer's gross vehicle weight rating (GVWR). A robust stainless steel option from a reputable brand like those found at Bass Pro Shops will last for years, shrugging off rust and heavy use.
Safety Chains and Pin: Non-Negotiable Essentials
These are the unsung heroes of your towing setup, and frankly, they're non-negotiable. Safety chains are a legal requirement in Ontario and provide a crucial backup if your main hitch connection fails. There should always be two independent chains, crossed under the coupler. Crossing them creates a "cradle" that can help support the trailer tongue if it separates from the hitch ball, preventing it from digging into the pavement and potentially causing a catastrophic accident.
The safety chains must be strong enough to hold the trailer's weight. Many trailers come with appropriately rated chains, but always double-check. The hitch pin or clip secures the ball mount in the receiver, preventing it from sliding out. Never, ever tow without a properly inserted and secured hitch pin. There are also locking hitch pins available, which offer added security against theft of your ball mount when you're parked. These small, inexpensive items are literally lifesavers and legally required, so never skimp on them or forget to use them. For those needing a refresher on all the rules, checking out Ontario Boating Laws for Anglers can be incredibly helpful.
Choosing the Right Components for Your Small Jon Boat
Now that you understand the individual components, let's talk about how to select the right ones specifically for your small jon boat. This is where many anglers get overwhelmed, but with a systematic approach, it's actually quite straightforward. The goal is a setup that is safe, efficient, and makes your towing experience as smooth as possible.
Matching Weight Capacities: Safety First!
This is arguably the most critical aspect of your hitch setup. Every component—your vehicle, the hitch receiver, the ball mount, the hitch ball, and even the safety chains—has a maximum weight capacity. You must ensure that the lowest rating among all these components (including the vehicle's stated towing capacity) is still greater than the Gross Trailer Weight (GTW) of your fully loaded jon boat trailer.
To determine your GTW, you'll need to know the weight of your jon boat, motor, fuel, battery, and all your fishing gear, plus the weight of the trailer itself. Don't guess here. A visit to a local public scale (like at a truck stop or recycling centre) can give you a precise weight for your loaded trailer. Most small jon boats are quite light, often under 1,000 lbs, but once you add a larger outboard, a full tank of gas, anchor, tackle boxes, and maybe a cooler full of ice, it can add up. Never exceed the lowest rated component in your towing system. For example, if your vehicle is rated for 2,500 lbs, your receiver for 3,500 lbs, and your ball mount for 2,000 lbs, your effective towing capacity is 2,000 lbs. Always err on the side of caution.
Getting the Right Ball Mount Drop/Rise for Level Towing
A level trailer is a happy trailer. If your trailer is nose-up, it can reduce tongue weight, making the trailer prone to swaying, especially at higher speeds. If it's nose-down, it puts excessive weight on the front of the trailer axle, leading to premature tire wear and potentially stressing the tow vehicle's hitch point. As discussed, measure from the ground to the top of your vehicle's receiver opening, and then from the ground to the top of your level trailer coupler.
Let's say your truck's receiver is 20 inches high, and your jon boat trailer's coupler, when level, is 16 inches high. You'll need a ball mount with a 4-inch drop. Many retailers, including larger outdoor stores like Bass Pro Shops or even general online marketplaces like Amazon, offer a wide range of ball mounts with different drops and rises. Some are fixed, while others are adjustable, allowing you to fine-tune the height. If you're unsure, it's always better to get a ball mount with slightly more drop or rise than you need, as you can often flip it over (if designed for it) to gain rise or simply choose a different hole for the hitch ball to slightly adjust.
Selecting the Correct Ball Size
This might seem obvious, but it's such a common mistake that it bears repeating: the hitch ball size must exactly match your trailer coupler size. Small jon boat trailers most commonly use a 1-7/8 inch or 2-inch hitch ball. Your trailer's coupler should have the size stamped on it. If not, measure the inside diameter of the coupler.
Using a ball that's too small will allow the coupler to bounce and potentially detach, while a ball that's too large simply won't fit. Imagine getting ready for a fantastic day of fishing on Lake Erie Fishing Guide only to realize your ball doesn't fit! This critical piece of gear is relatively inexpensive, so if you're ever in doubt, just buy a new one of the correct size. Make sure the ball's shank diameter also matches the hole in your ball mount, and that the shank is long enough to fully engage the locking washer and nut.
Wiring and Lights: Don't Forget the Electrical
Beyond the mechanical connection, you absolutely need to address the electrical connection for your trailer lights. In Ontario, as with most places, working trailer lights are a legal requirement. This includes tail lights, brake lights, turn signals, and sometimes side marker lights depending on the trailer's length. Most small jon boat trailers will use a standard 4-pin flat connector.
If your vehicle doesn't have a factory-installed trailer wiring harness, you'll need to install one. This typically involves connecting to your vehicle's existing tail light wiring. There are universal kits available, or vehicle-specific kits that are often plug-and-play, making installation much simpler. Make sure all connections are clean, waterproofed, and properly secured to prevent issues like intermittent lights or shorts, especially when backing into the water during launching. Regular checks of your trailer lights before each trip are crucial. Imagine being pulled over on your way to a great Bay of Quinte Walleye Fishing spot because your lights aren't working – not ideal!
Installation and Setup: Getting Your Jon Boat on the Road
Once you've gathered all your components, it's time to put it all together. This isn't just about bolting things on; it's about a systematic approach to ensure everything is secure and ready for the road. Taking your time here will save you headaches and potential hazards down the line.
Installing the Receiver (if not factory-installed)
If your vehicle didn't come with a factory-installed hitch receiver, you'll need to install one. This is often the most involved part of the entire setup, but it’s usually a job that can be done with basic hand tools for the mechanically inclined, or quickly by a professional at an automotive shop. Hitch receivers are typically designed to bolt directly to your vehicle's frame, often using existing holes.
The process usually involves:
- Preparation: Clean the vehicle's frame where the receiver will attach. You might need to temporarily lower a spare tire or remove a small panel.
- Mounting: Lift the receiver into position and align the bolt holes. It's often helpful to have a second person to assist with holding the receiver in place.
- Bolting: Insert the bolts, washers, and nuts as per the manufacturer's instructions. Crucially, tighten all fasteners to the specified torque settings. Overtightening can strip threads, and undertightening can lead to a loose and dangerous connection.
- Wiring: If not already present, install the trailer wiring harness at this stage, running the wires cleanly and securing them with zip ties to prevent them from dangling or getting snagged.
Always follow the specific instructions that come with your chosen receiver, as designs vary. This step lays the foundation for your entire towing system, so don't rush it.
Assembling the Ball Mount and Hitch Ball
This is where your chosen ball mount and hitch ball come together.
- Insert Ball: Slide the hitch ball's shank through the hole in your ball mount.
- Secure with Washer and Nut: Place the lock washer and then the nut onto the shank.
- Torque Down: Tighten the nut to the manufacturer's specified torque setting, which is often very high (e.g., 250 ft-lbs). This usually requires a large torque wrench, which can often be rented or found at well-stocked hardware or auto parts stores. A properly torqued hitch ball is paramount; a loose one can shear off or deform the ball mount.
Once the ball is securely mounted, you can insert the entire ball mount assembly into your hitch receiver. Remember to insert the hitch pin and secure it with its clip or lock. If you opt for a locking hitch pin, ensure the key is kept in a safe and accessible place.
Connecting to Your Jon Boat Trailer: The Hook-Up Sequence
With your hitch setup ready on your vehicle, it's time to connect your jon boat trailer. This process should become second nature, and always be done systematically.
- Back Up: Slowly back your vehicle up, aligning the hitch ball directly under your trailer's coupler. Many vehicles now have backup cameras with hitch guides, which are incredibly helpful.
- Lower Coupler: Use the trailer jack to lower the coupler onto the hitch ball. Ensure the ball is fully seated in the coupler.
- Engage Latch: Close and secure the coupler latch. This often involves a lever or clamp mechanism. For extra security, many couplers have a small pin or lock that goes through the latch to prevent accidental opening. Use it!
- Connect Safety Chains: Cross the safety chains under the trailer tongue and attach them to the designated points on your hitch receiver or vehicle frame. Ensure there's enough slack to allow for turns but not so much that they drag on the ground.
- Connect Wiring: Plug in your trailer's electrical connector (e.g., the 4-pin flat connector) into your vehicle's receptacle.
- Raise Jack: Fully raise and secure your trailer jack, ensuring it’s not dragging or interfering with ground clearance.
It's a lot of steps, but each one is important for a safe tow. Always take your time, especially if you're new to trailering.
Pre-Trip Checks and On-Road Safety
Before every single trip, whether it's a short drive to Best Shore Fishing Spots in Ontario or a longer haul up to Lake Nipissing Fishing Guide, you must perform a quick pre-trip inspection. This simple routine can prevent major problems.
Pre-Trip Checklist:
- Hitch Connection: Is the coupler fully seated and latched? Is the safety pin in place?
- Hitch Pin: Is the ball mount secured in the receiver with the hitch pin and clip/lock?
- Safety Chains: Are they crossed, properly attached, and not dragging?
- Electrical Connection: Is the wiring harness fully plugged in and secure?
- Trailer Lights: Check brake lights, turn signals (left and right), tail lights, and marker lights. Have a helper stand behind the trailer while you activate them.
- Tires: Check tire pressure on both the tow vehicle and the trailer. Look for any visible damage, bulges, or excessive wear. Don't forget the spare!
- Wheel Bearings: Briefly check if hubs are cool to the touch (if it's not the first check of the day). Listen for any unusual noises during initial movement.
- Load Distribution: Ensure your jon boat and gear are properly secured on the trailer, and the tongue weight feels appropriate (roughly 10-15% of the GTW).
- Tie-Downs: Ensure your boat is properly tied down to the trailer at the bow and stern, preventing it from shifting or launching off the trailer during braking or bumps.
On the road, remember that you're driving a longer, heavier, and less maneuverable combination. Allow for greater stopping distances, take wider turns, and be mindful of your speed, especially on winding roads. Strong crosswinds can particularly affect small, lightweight jon boats, causing sway. Taking a boating safety course or refreshing yourself on general boating and trailering regulations, perhaps including topics like Ontario Pleasure Craft Operator Card Requirement or Life Jacket Requirements for Ontario Boaters, can really boost your confidence and knowledge.
Maintenance and Troubleshooting Your Hitch Setup
Just like any other piece of fishing gear, your trailer hitch setup benefits from regular care. A little maintenance goes a long way in ensuring longevity and continued safe operation. Neglecting it can lead to rust, seizing, or even dangerous failures.
Regular Inspection and Lubrication
Your hitch components are exposed to the elements, from road salt in winter to splashes from the lake. This exposure means they're prone to rust and corrosion.
- Cleanliness: After each use, especially if you've been on dirt roads or near saltwater (though most Ontario fishing is freshwater, road salt is a factor), give your hitch components a quick wipe down.
- Rust Prevention: Periodically inspect your hitch receiver, ball mount, and hitch ball for signs of rust. A light coat of grease on the hitch ball, inside the receiver opening, and on the safety chain hooks can prevent rust and ensure smooth operation. For parts that show surface rust, a wire brush and a coat of rust-inhibiting paint can extend their life.
- Fastener Checks: Every few months, or after particularly rough trips, re-check the torque on all bolts securing the receiver to your vehicle's frame and the hitch ball to the ball mount. Vibrations can sometimes loosen fasteners over time.
- Wiring: Check your electrical connections for corrosion, frayed wires, or loose contacts. A small amount of dielectric grease applied to the pins of your electrical connector can help prevent corrosion and maintain a good connection.
These simple steps only take a few minutes but can save you from costly repairs or safety hazards.
Common Issues and Quick Fixes
Even with the best maintenance, things can occasionally go wrong. Knowing how to identify and address common issues quickly can prevent minor annoyances from becoming major problems.
- Difficulty Inserting/Removing Ball Mount: This is often due to rust or dirt inside the receiver tube. Clean out the receiver with a wire brush, spray some rust penetrant, and apply a thin coat of grease. If the receiver tube itself is bent, it might require professional attention or replacement.
- Loose Hitch Ball: If you notice your hitch ball nut is loose, do not tow. Get it properly torqued immediately. This is a critical safety issue. If the threads are stripped, replace the hitch ball and nut.
- Trailer Light Malfunctions:
- No Lights at All: Check the electrical connector for a secure connection. Inspect the vehicle's fuse box for a blown trailer fuse.
- Intermittent Lights: Often caused by a loose or corroded connection. Disconnect, clean contacts, apply dielectric grease, and re-connect firmly. Check for damaged wiring along the trailer frame.
- One Light Out: Check the bulb (if replaceable). Inspect the wiring to that specific light for breaks or corrosion.
- Brake Lights/Turn Signals Not Working: Beyond the general checks, ensure the vehicle's own brake lights and turn signals are working, as the trailer lights draw power from them.
- Excessive Trailer Sway: This is usually a sign of insufficient tongue weight, improper tire pressure, or an imbalanced load on the trailer. Re-distribute your gear to shift more weight towards the front of the trailer (within safe limits) and ensure all tires are at the recommended pressure. Sway control devices can also be added, especially for larger trailers, but for small jon boats, proper loading is usually the key.
- Safety Chains Dragging: If your safety chains are too long and dragging, they can wear down or get snagged. Shorten them by twisting them or adding an extra link, ensuring they still have enough slack for turns.
Having a small toolkit in your vehicle with basic items like a wrench, pliers, electrical tape, spare fuses, and a multi-meter can be invaluable for roadside troubleshooting. Don't forget that if you're ever trailering a boat through unfamiliar waters or regulations, perhaps a topic like Ontario Fisheries Management Zones, Explained could be a good quick read on your phone while waiting for your partner.
| Component | Primary Function | Common Sizes (Small Jon Boat) | Key Safety Check | Maintenance Tip |
|---|---|---|---|---|
| Hitch Receiver | Attaches to vehicle frame, accepts ball mount | Class I (1-1/4"), Class II (1-1/4") | Securely bolted to frame, no cracks | Keep inside clean, lubricate occasionally |
| Ball Mount | Connects receiver to hitch ball, sets height | Various drop/rise options | Proper drop/rise for level trailer, no bending | Inspect for bends/cracks, lubricate shank |
| Hitch Ball | Connects ball mount to trailer coupler | 1-7/8" or 2" | Matches coupler size, tightly torqued | Grease surface, check for wear |
| Safety Chains | Secondary connection in case of primary failure | Rated for GTW | Crossed, securely attached, adequate slack | Inspect for wear, rust, secure attachment points |
| Hitch Pin | Secures ball mount in receiver | Fits receiver opening | Fully inserted, clip/lock engaged | Check for bending, replace if damaged |
| Trailer Wiring | Provides power for trailer lights | 4-pin flat | All lights working (tail, brake, turn, markers) | Clean contacts, dielectric grease, secure wires |
This table provides a quick reference for the essential components of your jon boat trailer hitch setup. Remember, safety always comes first when towing. Take the time to understand your setup, maintain it properly, and perform those vital pre-trip checks, and you'll enjoy countless stress-free trips to your favourite fishing spots across Ontario. Happy trails and tight lines!
Disclaimer
This article is for general informational purposes only and does not constitute professional advice. Laws, prices and regulations vary by location and change over time. Consult a qualified professional for guidance on your specific situation.