Best Techniques for Deep Water Summer Lake Trout
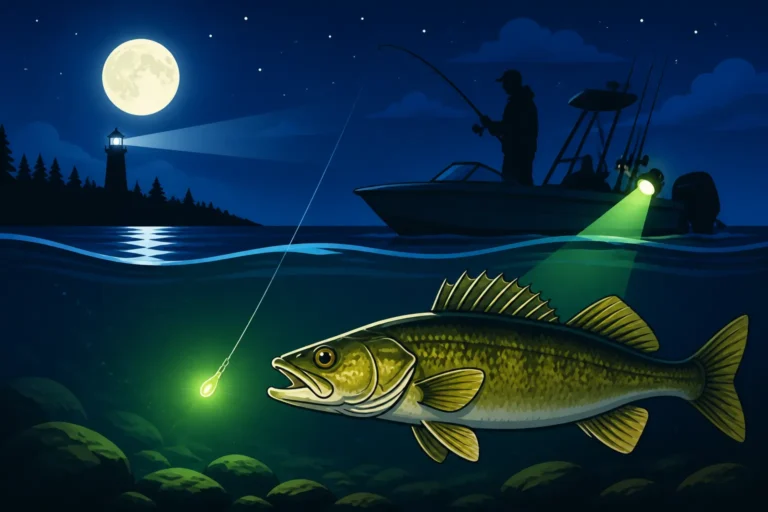
Summer in Ontario means stunning scenery, warm days, and generally, that the biggest, most elusive fish have retreated to the cool, dark depths. If you've ever spent a frustrating day on a sprawling northern Ontario lake, casting endlessly without a bite, you know the struggle of trying to find those elusive lake trout when the sun is high and the water is warm. This guide is all about equipping you with the specialized techniques and knowledge needed to consistently locate and catch magnificent lake trout in their deep summer haunts, turning those frustrating blank days into memorable angling adventures.
Understanding Summer Lake Trout Behavior and Habitat
Catching lake trout in the summer is a completely different ball game than spring or fall. When surface waters warm up, these cold-water loving fish don't just "move deeper" – they seek out very specific temperature zones and structures that provide them with comfort and access to their preferred forage. Understanding this migration and their preferences is the first step to unlocking success.
Thermal Stratification and Preferred Temperatures
As summer progresses, Ontario's deep lakes undergo a process called thermal stratification. This means the lake divides into distinct layers of water at different temperatures. You've got the warm upper layer (epilimnion), a middle layer where the temperature changes rapidly (thermocline), and a cold, deep layer (hypolimnion). Lake trout, being salmonids, have a very narrow range of preferred temperatures, typically between 8°C and 12°C (46°F to 54°F). During summer, this ideal temperature zone almost always exists within the thermocline or just below it in the upper hypolimnion.
What does this mean for us anglers? It means you can't just drop a lure anywhere deep. You need to find the specific depth where this temperature band is located. Modern fish finders with temperature graphs or even simple temperature probes can be invaluable here. Often, this sweet spot might be anywhere from 40 to 80 feet, or even deeper, depending on the lake's size, depth, and the specific weather patterns of the summer. Ignoring the thermocline is like trying to find a needle in a haystack; zero in on it, and your chances skyrocket.
Key Deep Water Structures and Forage
Once you've zeroed in on the right depth, the next challenge is finding where the fish are actually holding within that depth. Lake trout are predators, and like all predators, they'll be found where their food is. In many Ontario lakes, especially those in the cooler, northern regions or deeper bodies like Lake Superior or Lake Huron, their primary forage includes baitfish such as cisco (lake herring), smelt, and sometimes even smaller whitefish. These baitfish also prefer cooler water and will school up around specific deep-water structures.
Look for classic deep-water features:
- Submerged humps and reefs: These are underwater mountains or hills that rise up from the lake bottom but don't break the surface. Lake trout often patrol the edges and tops of these structures.
- Deep points and drop-offs: Areas where the lake bottom dramatically drops from a shallow shelf into much deeper water. Trout will ambush baitfish moving along these transitions.
- Underwater islands or rock piles: Similar to humps, these provide cover and ambush points.
- Basins and troughs: Deep, flat areas, especially if they have subtle contours or isolated rocks, can hold schools of baitfish, and thus, hungry lake trout.
Paying close attention to your Best Fish Finders for Ontario Lakes is crucial to identifying these underwater features and any baitfish schools they might be holding. Remember, lake trout are often suspended just off these structures or cruising along contours, not necessarily glued to the bottom.
Essential Gear for Deep Water Lake Trout
Tackling deep water lake trout effectively requires more than just your standard bass rod and reel. The sheer depth, the strong pulling power of a big laker, and the need to present lures accurately at precise depths demand specialized equipment. Skimping here can lead to frustration, lost fish, and wasted time.
Rods, Reels, and Line for the Depths
For deep-water trolling or vertical jigging, you'll need gear that can handle the pressure.
- Rods: Look for medium-heavy to heavy power rods, typically 7 to 9 feet in length. Longer rods help absorb the shock of a strike when trolling and can handle the weight of heavy tackle. A rod with a moderate-fast to fast action is ideal, offering enough backbone to fight big fish while still providing sensitivity to feel subtle bites or the action of your lure. Brands like Ugly Stik or Shimano offer durable options that stand up to the rigours of deep-water abuse.
- Reels: A robust baitcasting reel is generally preferred for deep trolling, especially if you're using downriggers, Dipsy Divers, or lead core line. Look for models with a high line capacity (at least 200-300 yards of braided line), a smooth, powerful drag system, and a comfortable retrieve ratio. For vertical jigging, a powerful spinning reel can also work, but many still prefer the control of a baitcaster.
- Line: This is where things get really important. Braided line is almost a non-negotiable for your main line. Its zero-stretch quality provides unparalleled sensitivity, allowing you to feel every bump, tic, and subtle bite even when your lure is 80 feet down. It also transmits the action of your lure much better than monofilament. Spool up with 30-50 lb test braid. For a leader, 15-25 lb fluorocarbon is the way to go. Fluorocarbon is nearly invisible underwater, extremely abrasion-resistant (great for rocky lake bottoms), and provides a bit of stretch for shock absorption. The length of your leader can vary, but 6-10 feet is a good starting point. You can find a good selection of Best Fishing Rods for Ontario Lakes and appropriate line on Amazon.
Downriggers, Dipsy Divers, and Lead Core
These are your primary tools for getting lures down to the fish's preferred depth and keeping them there consistently. Each has its pros and cons, and knowing when to use which can make all the difference.
- Downriggers: These are the most precise tools for deep trolling. A downrigger uses a heavy ball (typically 6-12 lbs) and a strong cable to pull your fishing line down to a specific, electronically controlled depth. Your fishing line is held by a release clip on the downrigger cable, which releases when a fish strikes, allowing you to fight the fish directly on your rod. This method offers excellent depth control and allows for lighter tackle on your rod, as it's not fighting the drag of the weight. They are fantastic for covering large areas and targeting a specific depth band, which is key for summer lake trout.
- Dipsy Divers (or Jet Divers): These are disc-shaped diving planes that attach directly to your main line. They use water pressure to dive to a set depth, and once a fish hits, they "trip" or "pop," allowing you to reel in the fish without the resistance of the diver. Dipsy Divers can be set to run to the side of the boat as well, helping to spread out your presentation and cover a wider trolling path. They are less precise than downriggers but are more portable and less expensive, making them a great option for boats without fixed downriggers. They come in various sizes and dive depths, so choose one appropriate for the depths you're targeting.
- Lead Core Line: This is a specialized fishing line with a lead wire embedded in its core, designed to sink. It's often "metered" in different colours (e.g., 10 yards per colour), allowing you to estimate how much line you need to deploy to reach a certain depth. While it requires a specific trolling speed to achieve depth and is not as precise as downriggers, it's very effective for subtly presenting lures. It's often used in conjunction with a fluorocarbon leader and a fairly long top shot of monofilament to attach to your backing. It’s particularly effective when you want to run multiple lines at different depths without the bulk of downriggers or divers. Understanding Trolling Techniques for Ontario Lake Trout that utilize these tools is paramount.
Effective Deep Trolling Techniques
Trolling is arguably the most consistent method for catching summer lake trout. It allows you to cover vast amounts of water, searching for actively feeding fish or schools of bait. The goal is to present your lure at the exact depth and speed that mimics natural forage.
Downrigging Precision for Lake Trout
Downrigging offers unmatched depth control, making it a favourite among serious lake trout anglers. The key is knowing how to set it up and run it effectively.
- Setting Up: Attach your lure (often a spoon, deep-diving crankbait, or a dodger/flasher with a fly) to a 6-10 foot fluorocarbon leader, which is then tied to your main line. Clip your main line into the downrigger release clip, ensuring just enough tension to hold it. Lower your downrigger ball to the desired depth, watching your fish finder for the thermocline and any fish marks.
- Speed and Lure Selection: Trolling speed is critical. For most spoons and crankbaits, a speed between 1.8 to 2.8 mph is a good starting point, but you'll need to experiment. Watch your rod tip; it should have a subtle bounce from the lure's action. If it's dead still, speed up or change lures. For lures, common choices include large, metallic spoons like those from Luhr-Jensen (e.g., J-Plugs, Coyote Spoons), Northern King, or various deep-diving crankbaits. Some anglers also use dodgers or flashers paired with a trailing fly or a small spoon, as the dodger attracts fish and imparts an erratic action to the trailing lure.
- Spreading the Spread: If you're running multiple downriggers, vary your depths by 5-10 feet to cover more of the thermocline. For example, if the thermocline is at 60 feet, one downrigger might be at 55 feet and another at 65 feet. You can also run two lines off one downrigger, using a stacking clip to place one lure above the other. This maximizes your chances and helps you identify the exact feeding zone.
Dipsy Diver Tactics and Lead Core Trolling
While downriggers are king, Dipsy Divers and lead core offer versatile alternatives, especially for smaller boats or when you want to run more lines.
- Dipsy Diver Use: Dipsy Divers come in various sizes (e.g., #0, #1, #2) and can be set to run straight back or at angles (0 to 3) off the boat. The larger the diver, the deeper it goes. Pair your diver with a fluorocarbon leader (6-12 feet) and your chosen lure. These are excellent for covering the outer edges of your trolling path, mimicking a wider school of baitfish. They also provide a different action than a downrigger, sometimes triggering strikes when other methods fail. Experiment with different colours and settings; often, the plain silver or green Dipsy Divers are highly effective.
- Lead Core Application: Lead core is fantastic for a stealthier presentation. The slower sink rate compared to downriggers allows the lure to maintain a more natural swimming action. To get a lure to, say, 50 feet, you might need 5-6 colours (50-60 yards) of lead core. A general rule of thumb is that each colour of lead core sinks about 5-7 feet, depending on lure type and trolling speed. Always attach a long (at least 30 feet) monofilament or fluorocarbon top shot to your lead core, followed by your leader and lure. This gives you a clear section of line near the boat for easier netting and less visibility to the fish. Lead core can be effectively used to target specific depths that might be just above or below what your downriggers are running, adding another dimension to your trolling spread.
Vertical Jigging and Drop Shotting
While trolling covers water, vertical presentations are excellent when you've pinpointed a school of fish or specific structure on your fish finder and want to present a lure directly to them. This active approach can be incredibly rewarding.
Jigging Spoons and Tubes
Vertical jigging is a dynamic way to entice deep lake trout, particularly when they are schooled up or holding tight to structure.
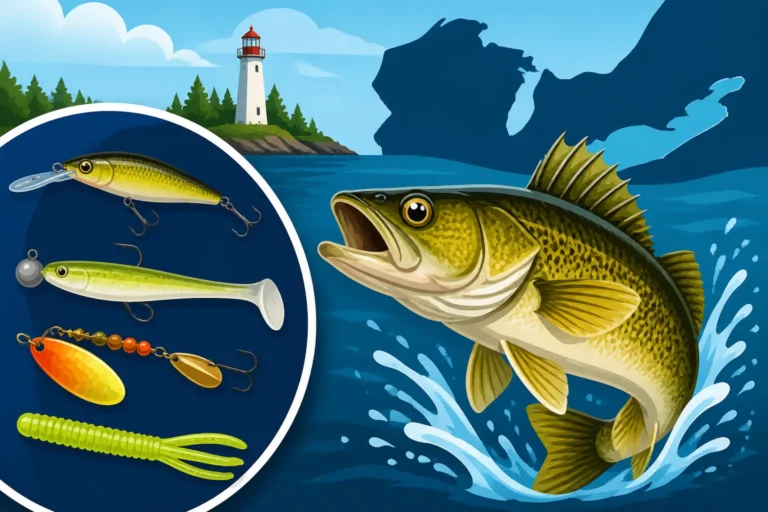
- Lure Selection: Heavy jigging spoons (1 to 3 ounces) are a go-to. Think Hopkins, Luhr-Jensen Crippled Herring, or larger Kastmasters. The flash and flutter on the fall are incredibly attractive. Tube jigs, especially larger ones (4-6 inches) in white, black, or natural baitfish colours, can also be very effective, mimicking injured baitfish. Some anglers even use heavy swimbaits or bucktail jigs.
- Technique: Position your boat directly over the fish or structure you want to target. Drop your lure straight down to the bottom or slightly above the marked fish. The retrieve involves a sharp upward snap of the rod tip (about 1-3 feet), followed by allowing the lure to free-fall on a semi-slack line. Most strikes occur on the fall, so pay close attention to your line for any subtle hesitations or taps. Reel up the slack quickly and repeat. It's a rhythmic process, and varying the intensity and speed of your jigs can often trigger bites. This is a great way to target fish on specific humps or the edges of drop-offs in lakes like Lake Superior.
- Sonar Importance: Your fish finder is your best friend here. You need to be able to see your lure on the screen and any fish reacting to it. This allows you to adjust your depth and presentation in real-time.
Drop Shot for Suspended Lakers
The drop shot rig isn't just for bass! It can be a deadly effective method for deep, suspended lake trout, especially those that are finicky or shy.
- Rigging: The beauty of the drop shot is that your weight is at the very bottom of your line, with your hook (and soft plastic bait) tied directly to the main line several inches or even feet above the weight. This keeps your bait suspended horizontally at a fixed depth, right in the fish's strike zone, regardless of how you move your weight on the bottom. For deep lake trout, you'll need a heavier drop shot weight (1/2 oz to 1 oz or more) to get down quickly and maintain bottom contact. Use a strong, sharp hook (size 1 to 3/0) and a small, natural-looking soft plastic minnow, worm, or grub.
- Presentation: Drop the rig down to the desired depth (again, where you're seeing fish on your sonar). Instead of aggressively jigging, the drop shot is fished with subtle twitches and shakes of the rod tip. The goal is to make the soft plastic bait quiver and dance enticingly without moving the main weight much. This makes it look like a vulnerable, injured baitfish struggling in place. When a fish bites, you often just feel a gentle pressure or a slight tick. Set the hook with a firm, sweeping motion. This method is particularly useful for fish that are hovering in open water or tightly grouped around a specific deep structure, and it often leads to cleaner hooksets.
Reading Your Electronics
Modern fish finders are more than just depth sounders; they are sophisticated tools that can literally show you the underwater world. Learning to interpret the information they provide is paramount to consistent success when fishing for deep water lake trout. It's not enough to just own one; you have to use it.
Interpreting Sonar and Side Imaging
Your fish finder is your eyes below the surface.
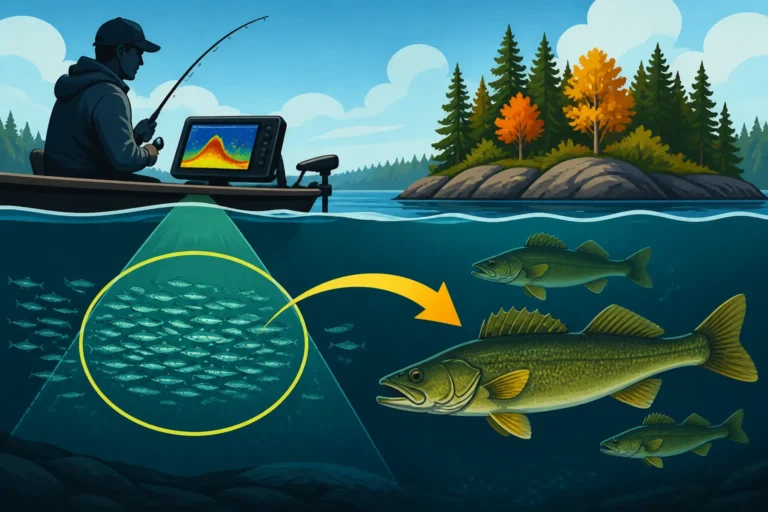
- Traditional Sonar (2D Sonar): This is your bread and butter. Look for arches or thick lines that indicate fish. The size and thickness of the arch can give you a clue about the size of the fish. Pay close attention to bait balls, which appear as dense clouds or clumps on the screen. Lake trout will often be found either directly in or just below these baitfish schools. Identify the thermocline – it often shows up as a distinct, hazy line or band on your 2D sonar screen, where the density of the water changes. This is where you want to focus your efforts. Many anglers, myself included, have found excellent deals on brands like Humminbird and Lowrance on Amazon when upgrading their units.
- Down Imaging/DownScan: This provides a photo-like view directly beneath your boat, making it incredibly easy to distinguish between bottom structure (rocks, humps, ledges) and fish. You can see individual trees, boulders, or even smaller baitfish with remarkable clarity. Use this to confirm what your 2D sonar is showing you and to precisely target structure.
- Side Imaging/SideScan: This revolutionary technology allows you to see out to the sides of your boat, scanning a much wider area. It's fantastic for quickly locating submerged humps, rock piles, and points that you might otherwise troll right over. You can see entire schools of baitfish and even individual large fish (like lake trout) holding off to the side, allowing you to adjust your course to intercept them. This is invaluable for efficiently scouting new water or quickly identifying productive areas.
GPS and Mapping for Deep Water Navigation
Beyond just seeing fish, knowing where you are and where you've been is equally important.
- Charting Productive Areas: Your GPS and mapping system allow you to mark waypoints for productive spots – the top of a hump where you caught a fish, a dense bait ball, or a key depth contour. This way, you can easily return to these spots later. Many units come pre-loaded with detailed lake maps for Ontario, showing depth contours, navigational aids, and even some submerged features. This information helps you understand the underwater topography before you even drop a line. The Ontario Fish ON-Line Interactive Zone Map, Explained is a fantastic resource to combine with your electronics for pre-trip planning.
- Creating Trolling Paths: Use your GPS to create precise trolling paths or "tracks." If you hit a hot zone, you can follow that track back through it, ensuring you hit the exact same depth and contour. This is especially useful for targeting specific deep-water structures. For example, on a large lake like Lake Simcoe, if you find a productive deep hump, you can program your GPS to troll a specific contour around that hump, maximizing your time in the strike zone. The ability to save tracks and waypoints is a game-changer for consistency.
Advanced Strategies and Safety Considerations
Success in deep water summer lake trout fishing isn't just about gear and techniques; it's also about understanding nuances, adapting to conditions, and always prioritizing safety.
Varying Presentation and Lure Colours
Lake trout can be fickle. What worked yesterday might not work today.
- Experiment with Depth: Even within the thermocline, a few feet can make all the difference. If you're not getting bites, adjust your downrigger or lead core depth up or down by 5-10 feet.
- Change Speeds: Slow down, speed up. Sometimes a slight change in trolling speed can make a spoon wobble differently or a crankbait dive deeper, triggering a strike.
- Lure Rotation: Don't be afraid to change lures frequently. If one colour or style isn't working, switch it up. Silver, blue/silver, green/silver, chartreuse, and white are common effective colours, but sometimes a hot pink or orange spoon can be the ticket, especially on overcast days or in stained water. The Best Lures for Muskie Fishing in Ontario can sometimes cross over with lake trout, especially larger spoons and crankbaits, so consider expanding your tackle box.
- Dodgers and Flashers: These are not lures themselves but attractors. They create flash and vibration that draw fish in, and the trailing fly or small spoon is what the fish actually eats. Different sizes and colours of dodgers (e.g., Doc's, Gibbs) can create different actions and vibrations, so experiment with these too.
Understanding Weather and Barometric Pressure
While often overlooked, weather patterns and barometric pressure can significantly impact deep water lake trout behavior.
- Stable Weather: Stable, high-pressure systems often mean consistent fishing, but fish might be less aggressive.
- Falling Barometer: A falling barometer, often signaling an approaching cold front or storm, can sometimes trigger a feeding frenzy. Fish know bad weather is coming and will often feed aggressively beforehand. However, after a cold front passes and high pressure sets in, fishing can get tough as fish become lethargic.
- Wind and Waves: While challenging to fish in, a good chop on the water can actually help. The surface disturbance can break up light penetration, making lake trout more comfortable moving slightly shallower in their preferred temperature zone. It also creates a more natural movement for your trolled lures.
Safety on Large Ontario Lakes
Fishing deep on large Ontario lakes, especially in summer, comes with inherent safety considerations.
- Weather Monitoring: Big lakes like Lake Superior, Lake Huron, or Lake Nipigon can turn from calm to treacherous in minutes. Always check the marine forecast before heading out and monitor weather throughout the day. A good marine radio or satellite weather device is highly recommended.
- Proper Gear: Ensure your boat is equipped with all required safety gear, including enough life jackets for everyone on board (check Life Jacket Requirements for Ontario Boaters). A fully charged marine battery, extra fuel, and an emergency kit (flares, whistle, first-aid) are non-negotiable. It's always a good idea to have a Best Cooler for a Fishing Boat not just for your catch, but for essential drinks and snacks to stay hydrated.
- Know Your Limits: Don't venture too far offshore if you're not experienced or if your boat isn't adequately sized and equipped for large water bodies. Inform someone of your float plan – where you're going and when you expect to return. This is especially true for those exploring remote areas where cell service might be spotty. Always ensure your boat is in top shape, especially if you’re pushing into deeper waters and further from shore.
A Comparative Look at Deep Water Lake Trout Techniques
To help you decide which technique might be best for your next outing, here's a quick comparison of the primary methods discussed.
| Technique | Primary Use | Depth Control | Gear Complexity | Advantages | Disadvantages |
|---|---|---|---|---|---|
| Downrigging | Precise depth targeting, covering water | Excellent | High | Most accurate, allows light tackle, consistent | Expensive, requires fixed mounting, less stealthy |
| Dipsy Diver Trolling | Covering water, spreading lures | Good (less precise) | Medium | Portable, less expensive, good spread coverage | Depth less exact, more resistance on rod |
| Lead Core Trolling | Stealthy presentation, covering water | Fair (speed dependent) | Medium | Very subtle, good for wary fish | Depth estimation, slow retrieve, bulky line |
| Vertical Jigging | Pinpointing schools, active fish | Excellent | Low | Active, great for targeted fish, exciting bites | Requires precise boat positioning, less water covered |
| Drop Shotting | Finicky fish, suspended fish | Excellent | Low | Very subtle, horizontal bait presentation | Best for specific spots, slower presentation |
Whether you're exploring the vastness of Lake Superior or targeting deep pockets in a smaller lake in Algonquin Park, these techniques, combined with a keen understanding of lake trout behaviour and safety protocols, will significantly improve your chances of success. It’s a challenge, for sure, but landing a magnificent summer laker from the depths is a truly rewarding experience.
Disclaimer
Fishing regulations and safety requirements can change. Always consult the most current Ontario Fishing Regulations Summary, available from the Ontario Ministry of Natural Resources and Forestry (MNRF) or on their website, before heading out. This guide is for informational purposes only and does not supersede official regulations. Stay safe and fish responsibly.