Best portable fish finder for kayak fishing
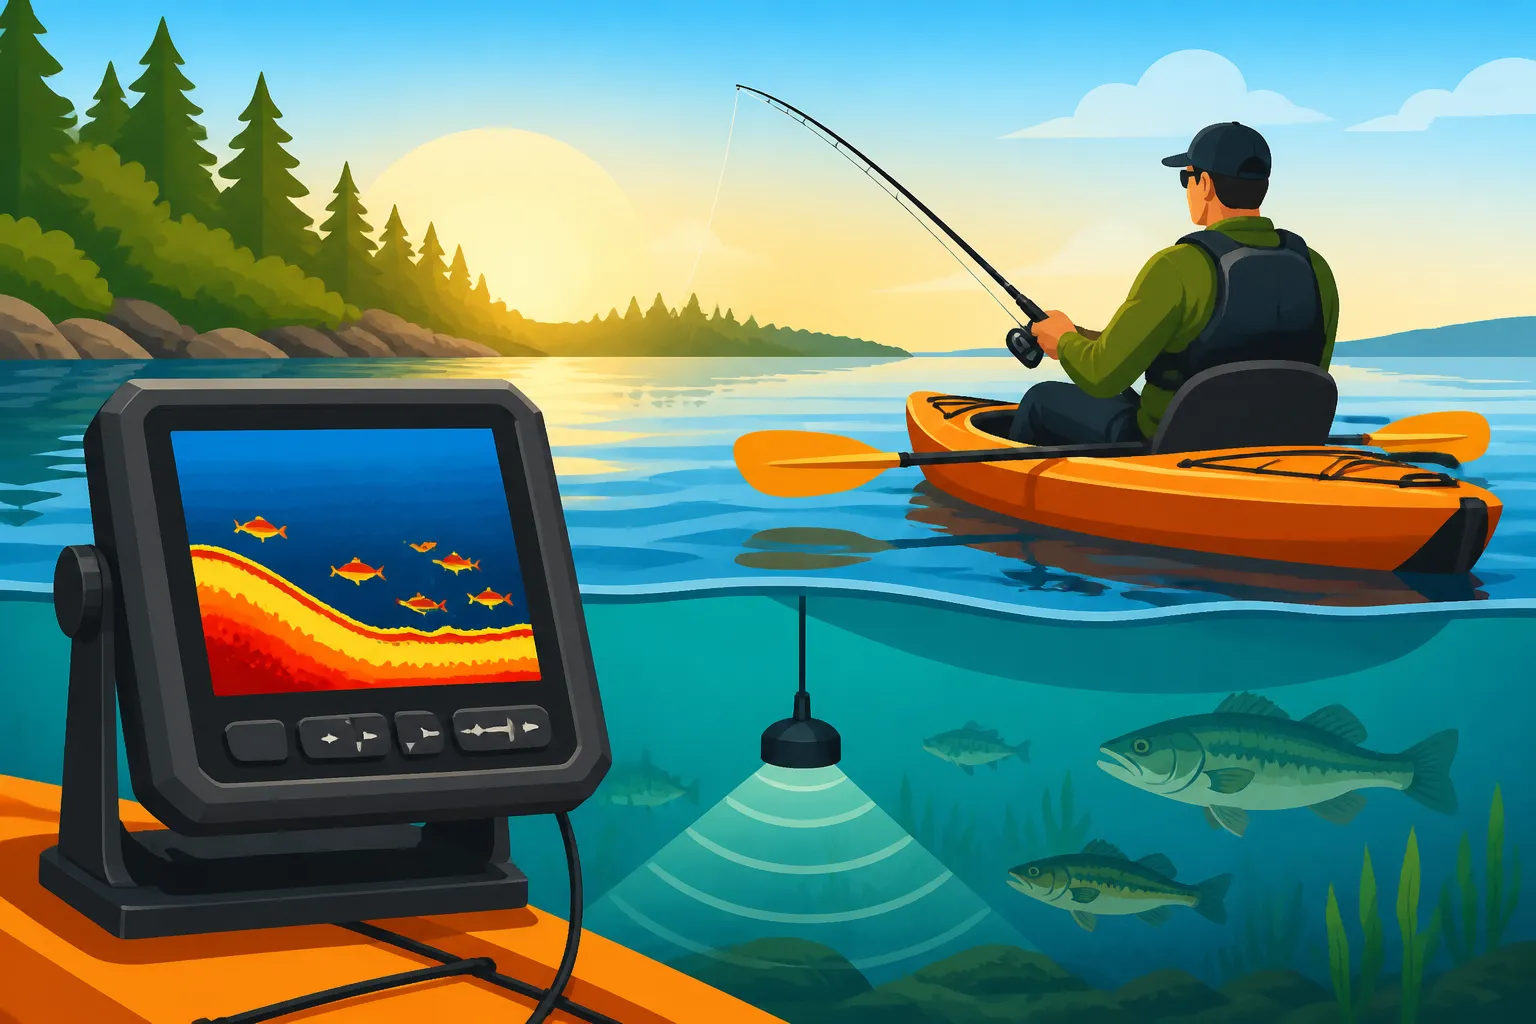
Trying to find fish from a kayak in the vastness of an Ontario lake or river can feel like searching for a needle in a haystack. You paddle around, cast your line, and hope for the best, often leaving the water wondering if you missed prime fishing grounds. This guide is here to change that, offering a comprehensive look at how a portable fish finder can transform your kayak fishing experience, helping you locate structure, identify fish, and ultimately, catch more in Ontario's incredible waters.
Why a Portable Fish Finder is a Game-Changer for Kayak Anglers
For years, many of us kayak anglers relied on our eyes, intuition, and perhaps a good map to find fish. We'd look for weed lines, fallen trees, or sudden changes in current, hoping that where fish should be, they actually were. But let's be honest, that guesswork can be incredibly frustrating, especially when you're working hard just to move your craft around. A portable fish finder cuts through that uncertainty, giving you a literal window into the underwater world. It's not just a fancy gadget; it's an essential tool that levels the playing field, making you a more efficient and successful angler.
The Kayak Angler's Unique Challenges
Kayakers face a unique set of challenges that powerboaters often don't. First, mobility is different. We're propelled by paddle or pedal, meaning we can't zip from one side of Lake Simcoe to the other in minutes. Every stroke counts, and every location choice needs to be deliberate. Wasting time paddling over barren water is exhausting and demoralizing. Secondly, space is at a premium. Unlike larger boats with ample dash space for big electronics, a kayak has limited real estate. This means bulky units, complex wiring, and permanent installations just aren't practical. Finally, deployment and retrieval can be tricky. When you're launching from a rocky shoreline or a muddy bank, you need gear that can be easily attached, detached, and secured, without fear of it getting damaged or falling overboard. This is where the "portable" aspect truly shines.
Imagine you're targeting smallmouth bass on Georgian Bay. You know they love rocky structure, but how do you find those hidden ledges or subtle rock piles that aren't visible above the surface? Without a fish finder, you're just blind casting. Or perhaps you're exploring a new stretch of the Grand River for walleye, trying to locate those deeper pockets where they ambush baitfish. Paddling aimlessly wastes precious fishing time and energy.
How Portability Solves Kayak-Specific Issues
Portable fish finders are designed with these exact challenges in mind. Their compact size means they fit perfectly on a kayak console, track mount, or even in a cup holder if it's a castable unit. Many come with versatile mounting options, like clamp-on transducers or suction cups, making deployment a breeze. You can often set them up in minutes at the launch, and pack them away just as quickly when you're done, minimizing fuss and maximizing fishing time.
This portability also extends to power. Many run on small, self-contained battery packs, eliminating the need for complex wiring to your kayak's battery system. Some even use rechargeable internal batteries, much like your smartphone. This means less rigging, less weight, and fewer things to worry about when you're out on the water. For anglers who might use different kayaks, or who want to lend their unit to a friend, the ability to quickly transfer the fish finder is invaluable. It transforms what could be a permanent fixture on a larger boat into a flexible, adaptable tool for any kayak fishing adventure, whether you're chasing Smallmouth Bass Fishing in Ontario or exploring new waters for pike.
Key Features to Look for in a Kayak Fish Finder
Choosing the right portable fish finder for your kayak involves more than just picking the first one you see. There's a whole world of technology packed into these compact units, and understanding the key features will help you select one that truly enhances your time on the water, rather than adding more complexity. It’s about matching the features to your specific fishing style and the types of waters you frequent in Ontario.
Transducer Type and Mounting Options
The transducer is the "eye" of your fish finder, sending out sonar waves and listening for their return. For kayak fishing, the type of transducer and how it mounts are critical.
- Clamp-on/Suction Cup: These are fantastic for true portability. They can be quickly attached to the side of your kayak or hull. They're easy to install and remove, perfect if you frequently transport your kayak or don't want a permanent fixture. The downside can be that they might occasionally shift if bumped or if you hit heavy weeds.
- Scupper Hole Mount: Many fishing kayaks have scupper holes designed for drainage. Some fish finders offer specific kits that allow you to mount the transducer directly into a scupper hole, providing a clean, protected, and submerged installation. This is very popular as it keeps the transducer out of the way.
- In-Hull Mount: This involves gluing the transducer to the inside of your kayak's hull. It shoots through the plastic, meaning no holes in your kayak and a completely protected transducer. The trade-off is a slight loss in sonar signal strength, and it usually requires a dedicated space inside the hull that is clear of air bubbles.
- Castable Sonar: These are small, spherical devices that connect wirelessly to your smartphone or tablet. You simply cast them out with a rod and reel, retrieve them slowly, and get readings directly on your device. They're incredibly portable and require no mounting to the kayak itself, making them perfect for those who want minimal setup. However, they rely on your phone's battery and screen, which can be an issue in bright sun or cold weather. Brands like Deeper and Lowrance make popular castable options that you can often find at stores like Bass Pro Shops or through online retailers like Amazon.
Display Size and Clarity in Bright Sun
When you're out on the water, especially on a bright summer day on Lake Erie or a sunny winter day ice fishing on Lake Simcoe, screen visibility is paramount.
- Screen Size: While larger screens are always appealing, remember the kayak's limited space. A screen in the 4-7 inch range is often a sweet spot for portability and readability. Anything much larger might start to feel cumbersome on your deck.
- Resolution and Backlighting: Higher resolution means sharper images and more detail. Good backlighting is crucial for cutting through glare. Look for displays that offer adjustable brightness and have a strong contrast ratio. You'll be glad you invested in a clear screen when trying to interpret subtle arches representing fish or distinguishing structure in murky water. Nothing is more frustrating than squinting at a washed-out screen when you're trying to pinpoint a walleye.
Battery Life and Power Sources
Powering your portable unit is a key consideration for long days on the water.
- Internal Rechargeable Batteries: Many compact units come with built-in rechargeable batteries, similar to what you'd find in a smartphone or tablet. These are incredibly convenient, as you simply charge them up the night before. Check the manufacturer's stated battery life – you'll want at least 6-8 hours for a full day of fishing, and more if you plan extended trips or use power-hungry features like GPS.
- External Battery Packs: Some portable fish finders, especially those with larger screens or more powerful sonar, might use small external 12V batteries (e.g., lithium or sealed lead-acid). These can be housed in waterproof cases and are usually compact enough to fit in a kayak. While they add a bit more weight, they often provide much longer run times and can power other accessories like a Best Trolling Motor for a Fishing Kayak.
- USB Power Banks: For castable units that pair with your phone, bringing a robust USB power bank is a must. Your phone's battery will drain quickly running the app and connecting wirelessly. This also works as a backup power source for any fish finder with a USB charging port.
Sonar Technologies: CHIRP, Down Imaging, Side Imaging
The advancements in sonar technology have dramatically improved our ability to "see" underwater.
- Traditional 2D Sonar (CHIRP): This is the bread and butter of fish finders. CHIRP (Compressed High-Intensity Radar Pulse) sonar sends a range of frequencies, providing clearer, more detailed returns, better target separation (distinguishing individual fish), and less noise than older single-frequency units. It's excellent for identifying fish arches and general bottom contours directly beneath your kayak.
- Down Imaging/DownScan: This technology provides picture-like views of what's directly below your boat, showing structure and fish in incredible detail, almost like a photograph. It's fantastic for identifying specific types of submerged timber, rock piles, or weed beds that might hold fish. If you're looking for Best Drop-offs to Fish on Lake Nipissing, this can show you precisely what's there.
- Side Imaging/SideScan: This is a more advanced feature that gives you a view of what's to the left and right of your kayak. While typically more common on larger boats, some high-end portable units offer this. It's incredibly useful for covering wide areas, finding structure or schools of fish that you might otherwise paddle right over. For kayakers, however, the width of a kayak means the range might be limited, and the speed at which you paddle can affect the clarity of the side-scan image. Consider if the extra cost and complexity are worth it for your specific kayak fishing style.
GPS and Mapping Capabilities
GPS and mapping turn your fish finder into a comprehensive navigation tool.
- Basic GPS: Even simple GPS functionality can be a huge asset. It allows you to mark waypoints for hotspots, launch points, or submerged hazards. If you find a promising weed bed while doing some Kayak Fishing Techniques for Ontario Lakes, you can mark it and return later.
- Mapping (Preloaded or Downloadable): More advanced units come with preloaded maps or the ability to download detailed charts of Ontario lakes and rivers. These maps show contours, depth changes, navigation markers, and sometimes even points of interest. This is invaluable for understanding the overall layout of a body of water, planning your routes, and navigating safely. It’s particularly helpful on large, complex systems like the Kawartha Lakes or the French River.
| Feature Type | Basic Portable Sonar (e.g., Castable) | Mid-Range Portable Unit (e.g., Clamp-on) | Advanced Portable Unit (e.g., Scupper Mount) |
|---|---|---|---|
| Primary Use | Quick spot checks, minimal setup | General fish finding & structure ID | Detailed scouting, navigation, specific target |
| Transducer Mount | Castable, wireless | Clamp-on, suction cup | Scupper hole, in-hull, small transom mount |
| Display | Smartphone/Tablet screen | 3-5 inch color screen | 5-7 inch high-res color screen |
| Sonar Tech | 2D (CHIRP often) | 2D (CHIRP), sometimes Down Imaging | 2D (CHIRP), Down Imaging, sometimes Side Imaging |
| GPS/Mapping | Basic GPS via phone | Basic waypoint marking | Full GPS, preloaded/downloadable maps |
| Power Source | Internal rechargeable, phone battery | Small internal battery or external 12V | External 12V battery, longer life |
| Portability | Excellent, pocket-sized | Very good, quick detach | Good, takes a few minutes to set up/remove |
| Durability | Generally water-resistant | Often IPX7 waterproof | Often IPX7 waterproof, robust |
Top Considerations for Choosing Your Portable Unit
Beyond the core features, there are practical considerations that will influence your long-term satisfaction with a portable fish finder. Think about how you actually fish, how you transport your kayak, and what your priorities are when it comes to technology and budget. This isn't just about what sounds good on paper; it's about what will genuinely enhance your time on the water chasing Walleye Fishing in Ontario or other species.
Ease of Installation and Removal
As a kayak angler, you're constantly dealing with setup and breakdown. A fish finder that's a headache to install or remove will quickly become a source of frustration, no matter how good its sonar is.
- Quick-Release Mounts: Look for units with quick-release cradles or clamps. This allows you to snap the head unit on and off easily, so you can store it safely when transporting your kayak or after a day of fishing. This also makes charging the battery simpler if it's an integrated unit.
- Simple Wiring: Portable means minimal wiring. Many units use a single cable from the transducer to the head unit, and a simple power connection. Avoid anything that requires complex routing of wires through bulkheads unless you're confident in making those modifications to your kayak, and be sure to check out guides for Best Tackle Box Setup for Ontario Anglers for other organizational tips.
- Transducer Deployment: For traditional transducers, consider how easily you can deploy and retrieve it. A simple clamp onto the transom or a specialized arm that lowers into the water is ideal. If you're going with a scupper hole mount, ensure it's a tool-free installation or at least very straightforward. This matters greatly when you're launching in less-than-ideal conditions, like a rocky shore, where fumbling with small parts could lead to dropped gear.
Durability and Waterproofing for On-Water Conditions
Kayak fishing is an inherently wet activity. Your gear is going to get splashed, dripped on, and possibly even submerged if you capsize. Durability isn't a luxury; it's a necessity.
- IPX Rating: Look for an IPX waterproof rating. IPX7 is generally considered the standard for marine electronics, meaning the device can withstand submersion in up to 1 meter of water for 30 minutes. This provides peace of mind against splashes, heavy rain, or even a brief dip if your kayak flips. Always double-check this specification.
- Robust Construction: The unit should feel solid and well-built. The screen cover should be tough, and buttons should be sealed. Hinges or mounting points should be sturdy. A cheap, flimsy unit might save you a bit upfront, but it's likely to fail quickly under the rigorous conditions of kayak fishing. This is particularly important for units from brands like Humminbird or Garmin which are known for their rugged construction.
- Cable Protection: Pay attention to the transducer cable. It should be durable and resist kinking or fraying, as it will be exposed to the elements and potentially sharp edges on your kayak. Many manufacturers provide strain relief at connection points to prevent damage.
Balancing Features with Budget
This is often the trickiest part. Everyone wants the latest and greatest technology, but budgets are real.
- Define Your Needs: Before you even look at prices, honestly assess what features you truly need. Are you just looking for basic depth and fish arches in shallow lakes? Or do you need detailed mapping and side imaging for vast, deep waters? If you mostly fish small, clear streams for trout, a simple castable unit might be all you need. If you're exploring Best Fishing Lakes in Ontario with complex structures, you might want more advanced sonar.
- Entry-Level Options: Many excellent entry-level portable fish finders offer solid 2D sonar and basic depth readings at an accessible price point. These are fantastic for beginners or those with simpler needs. Don't feel pressured to buy the most expensive model if you won't use all its advanced features.
- Mid-Range and High-End: As you move up the price ladder, you'll gain features like CHIRP sonar, Down Imaging, GPS with mapping, and larger, higher-resolution screens. These are fantastic tools for serious anglers who want every advantage. Consider stores like Bass Pro Shops, which often have a wide selection and knowledgeable staff who can guide you through the options, or check online at Amazon for competitive pricing.
- Accessories Add Up: Remember to factor in the cost of accessories. This might include a specialized kayak mount, an extra battery, a dry bag to protect the unit when not in use, or even a protective cover. Sometimes, bundling these items with your purchase can save you money. Always compare the total cost, not just the unit price.
Making the Most of Your Portable Fish Finder on the Water
Having a portable fish finder mounted on your kayak is one thing; truly understanding how to use it to its full potential is another. It's not a magic bullet that instantly makes fish appear, but rather a powerful interpretative tool. Learning to read its signals and manage its power will significantly boost your success and satisfaction on the water, whether you're targeting Ontario Walleye Opener Dates by Zone or simply enjoying a peaceful paddle.
Reading Your Sonar Effectively
Your fish finder is constantly painting a picture of the underwater world, and learning to decipher that picture is key to finding fish.
- Understanding Arches: Fish typically appear as arches or boomerang shapes on your 2D sonar screen. A strong, thick arch usually indicates a larger fish, or one directly beneath your transducer. Partial arches might be fish on the edge of the sonar cone. Learning to differentiate these from debris or bait balls takes practice, but the clarity of CHIRP sonar makes this much easier. Don't just look for arches; look for patterns of arches in relation to structure.
- Interpreting Structure: Your fish finder will show you ledges, humps, weed lines, and submerged timber. These are crucial areas where fish hide, feed, and spawn. Pay attention to how fish relate to this structure. Are they sitting on top of a submerged rock pile? Are they hugging the edge of a deep weed bed? Use features like Down Imaging to get a clearer, more photographic view of what that structure truly looks like. Knowing how to read these details can help you pinpoint specific Best Deep Water Structure Spots on Lake Nipissing.
- Bottom Composition: Many fish finders can also give you an indication of bottom hardness. A harder bottom (rock, gravel) will often show a thicker, more intense second return echo than a soft bottom (mud, silt). This can be vital information, as different species prefer different bottom types for feeding or spawning. Walleye, for instance, often prefer gravel or rocky bottoms.
- Adjusting Sensitivity and Range: Don't just leave your unit on factory default settings. Play with the sensitivity (gain) to get a clearer picture without too much clutter. Adjust the depth range to focus on the water column you're most interested in. Sometimes turning down the sensitivity slightly can help eliminate surface clutter, especially in choppy water.
Power Management Tips
Even the best portable fish finders are useless if they run out of juice mid-day. Smart power management ensures your unit lasts as long as you do.
- Charge Fully Before Each Trip: This seems obvious, but it's easy to forget. Make it a habit to fully charge your fish finder's internal battery or external battery pack the night before every outing.
- Optimize Display Settings: The display is often the biggest power consumer. Reduce screen brightness when possible (e.g., on cloudy days or in the morning/evening). Many units have a power-saving mode or an "all-off" screen option that still records sonar data.
- Disable Unused Features: If you're not actively using GPS or side imaging, turn those features off if your unit allows for individual toggling. Every feature draws power, so only use what you need.
- Carry a Backup Power Source: For internal battery units, a robust USB power bank can provide a critical top-up. For external 12V batteries, consider carrying a small, charged spare if you plan on exceptionally long days or multi-day trips. Remember, cold weather can also significantly reduce battery life, so be prepared if you're out for some early season Spring Walleye Fishing Techniques for Ontario.
- Inspect Connections: Ensure all power connections are clean and secure. Loose connections can lead to intermittent power, which wastes energy and can even damage the unit over time.
Maintenance for Longevity
Taking care of your fish finder will ensure it serves you well for many seasons.
- Clean After Every Use: Rinse the unit and transducer with fresh water after each trip, especially if you've been in brackish or silty water. Use a soft cloth to gently wipe the screen. Avoid harsh chemicals or abrasive materials that can scratch the display or damage seals.
- Dry Thoroughly: Before storing, ensure the unit and all connections are completely dry. Moisture can lead to corrosion, especially on electrical contacts.
- Proper Storage: Store your fish finder in a dry, temperate place, ideally in a protective case or a Best Dry Bag for Kayak Fishing. Avoid extreme temperatures, as these can degrade batteries and damage internal components. Remove batteries if storing for extended periods, unless it's a built-in rechargeable battery designed for long-term storage (check manufacturer recommendations).
- Inspect Cables and Connections: Periodically check all cables for kinks, cuts, or frayed insulation. Inspect connectors for corrosion. A small amount of dielectric grease can help protect electrical contacts on removable connections. If you find significant damage, replace the cable if possible, or have it serviced. Regular care means your investment will keep helping you find the fish, trip after trip.
Disclaimer
This article is for general informational purposes only and does not constitute professional advice. Laws, prices and regulations vary by location and change over time. Consult a qualified professional for guidance on your specific situation.